Dragon Soul. Perhaps a more fitting name would be “Raid of the 1.5 Tanks.” Nearly every fight has a place for you to go cat form, or for non-druid tanks to sit around and dance. If they don’t have that opportunity, then it’s just a 1 tank fight to begin with. I like to think that this instance was designed to give feral druids one last go at being that tank who dpses, because damn there are a lot of opportunities to do so.
This post isn’t intended to be a strategy guide. I wrote it because it’s hard to know which fights require one tank and which fights require two for 10 man normal modes. It can also be difficult to figure out the tank’s role if you’re just reading the dungeon journal, so hopefully I can lend some assistance there.
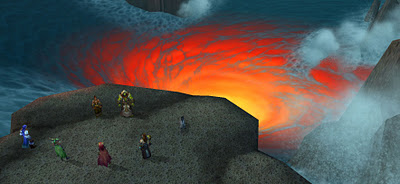
Morchok
Technically a 2 tank fight, but all you really need is a 1.5 tank set up, similar to Rhyolith. If you’re feral, this is a good opportunity to wear cat gear while bear specced. Dps most of the time, taunt whenever (if-ever) your co-tank gets more than 3 (approximately) stacks of Sunder Armor. Most of the time they’ll end up dodging enough to let the stacks fall off. I only tanked for maybe 20 seconds while my co-tank was waiting for his stacks to drop. This fight is also incredibly easy, so don’t stress it.
Warlord Zon’ozz

Single tank fight. I didn’t get a chance to tank him, but from what I picked up while dpsing, the tank’s job is to face the boss toward the ranged group at the pull, and then turn him around once the purple sphere spawns. Once it’s time to let the boss get hit by the sphere, it’s the tank’s job to make sure he hits. Try to save survival and dps cooldowns for after the boss gets hit, because the raid will be taking lots of damage. This fight might take a little practice to get the group movements down.
Yor’sahj the Unsleeping
We used one tank for this fight. You can use two tanks to taunt off each other because he puts a heavy dot on his target, but that the dot usually had time to fall off on its own. Don’t get overwhelmed by the opportunities for randomness in this encounter; it’s incredibly forgiving. We always killed the purple slime when it spawned, then picked whichever we didn’t like if it didn’t spawn. I dps’d this fight, so I can’t tell you much more about the tanking. Here are the notes I had sitting beside my computer that described each of the orbs in a succinct manner.
Yellow (“Glowing”): Void bolt aoe, boss deals more damage to tank.
Blue (“Cobalt”): Mana void, kill the mana void to get mana back.
Red (“Crimson”): Fire damage based on distance, stack up.
Black: Fixate adds spawn.
Green (“Acidic”): Moderate AoE/splash damage, spread out.
Purple (“Shadow”): 5 heals on a target makes them explode.
Hagara the Stormbinder
Another 1 tank fight. We originally thought she was a 2 tank fight, but she only spawned one add instead of two, so there wasn’t anything for me to do. If you are the tank, tank the lightning add near one of the weird little lightning rod thing she spawns so that when it dies, it overloads. The rest of this fight is just staying out of bad, and using cooldowns when she starts to hit hard.
Ultraxion
The first true 2 tank encounter in Dragon Soul. You might be tempted to go cat whenever you’re not tanking in this encounter, but you won’t get the buff Last Defender of Azeroth if it’s applied while you’re in cat form, which greatly reduces the cooldown and increases the duration of your defensive cooldowns. That buff makes it possible to keep Barkskin up nearly 100% of the time, and you get to use your other cooldowns quite liberally.
Use Heroic Will, the clicky ability they give you for this fight, whenever Ultraxion casts Hour of Twilight. Heroic Will will keep you out of the twilight realm for 5 seconds. As a tank, you’ll get another debuff, Fading Light, that you have to use Heroic Will to counter. Do not use Heroic Will until you have less than 5 seconds left on that debuff, or else you will zone back into the twilight realm too early and die. I did this way too many times before I figured out what was killing me. Sometimes a Fading Light and a Hour of Twilight will happen close together, but you will have time to dodge both, you just need to spam the button.
Warmaster Blackhorn
If you have a paladin tank, they can pretty easily tank the first phase by bubbling debuffs. However, we found it simpler to have each tank pick up their own mob, then swap mob types the next time they spawned. If you pick up the Slayer first, pick up the Dreadblade second. The mobs cleave, so avoid tanking them near others.
When the boss finally lands, he stacks Sunder Armor. We taunted off each other at 2 stacks. There’s a lot of movement and external damage during this phase, so use cooldowns and stay on your toes. Don’t forget to dodge Shockwave.
Spine of Deathwing
Ideally, you need two tanks so that when more than one Hideous Amalgamation is up, you can separate them. You have to separate one Amalgamation from the rest because you need just one to receive the debuff inflicted by Corrupted Blood. Once it gets 9 stacks, it starts to explode. Tank the single Amalgamation near the closest plate that you plan to break off, then run to the back once it starts casting its explosion. You should also try to pull Corrupted Bloods to you so that they can die near your amalgamation. If you’re the extra Amalgamation tank, you can dps most of the time, just be prepared to pick up extra amalgamations and tank them on the opposite side. We didn’t need the extra dps, so most of my time was spent doing nothing in the back, waiting for amalgamations to spawn. They don’t spawn very often. Sometimes you need to dps the Corruption Tentacles (big fiery orange ones) to keep them from using their stun attack, and sometimes you need to help pick up Corrupted Blood so that it doesn’t beat on a healer.
Madness of Deathwing
This fight will probably take most groups a few weeks to master. It’s a bit complicated, though rightly so. With high dps, you will only need 1.5 tanks, but most groups will do better with 2 full tanks. In phase 1, tanks need to pick up the Mutated Corruption. Those are the big red tentacles that spawn in the back. It doesn’t say this in the Dungeon Journal (that I can find), but Mutated Corruptions apply a debuff to you after they Impale you which increases your damage taken by Impale. Impale all by itself is something you need to cooldown, so the debuff is not something you can cheese. It’s best for the second tank to taunt after the first Impale. However, if your group’s dps is high enough, most Mutated Corruptions will only have a chance to Impale once. Impale is a casted ability, so you will have plenty of time to prepare cooldowns. Also in Phase 1, tanks will need to pick up Regenerative Blood. They’re not hard to pick up, just don’t forget about them. While Ysera is active, don’t forget to use the clicky ability, which reduces damage taken by 50% for 2.5 seconds, on a 30 second cooldown.
As a general tip for Mutated Corruptions, they also use a Crush ability. The wording on the tooltip makes it sound like it will only hit the tank, but in reality it picks random people to smash. The best way to avoid this is to spread out so that no two people are in the same radial line from the Mutated Corruption. This is a very long fight, and mana is a big deal, so avoid damage where you can.
In Phase 2, tanks will need to pick up Elementium Terrors. Two will spawn, and they each hit very hard so it’s best to have a tank for each one. They apply a stacking DoT, so they need to be dps’d down. During this phase, you will have access to Ysera’s clicky ability; use this often while tanking Elementium Terrors. You should tank these guys in the middle of Nozdormu’s Time Zone (which looks like Power Word: Barrier) because it slows down their attack speed.
Deathwing also apparently keeps his loot in his jaw. Maybe that explains why that thing is so huge.