
This guide is the distilled essence of what is needed for tanks to jump into their first few attempts of bosses in Blackrock Foundry. You won’t find any in-depth strategies here (though you might find them here). Instead, you’re going to get just enough information to wrap your head around the encounter; a trickle of strategy, not a firehose. This guide is ideal for those attempting LFR, Normal, and Heroic BRF.
- Gruul
- Oregorger
- Blast Furnace
- Hans’gar & Franzok
- Flamebender Ka’graz
- Kromog
- Beastlord Darmac
- Operator Thogar
- Iron Maidens
- Blackhand
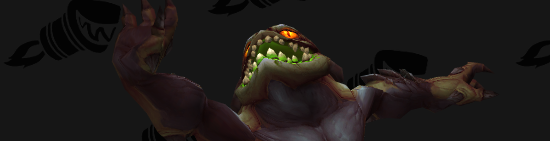
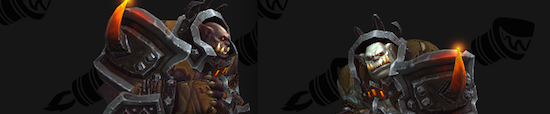
Gruul

Key Mechanics
- Tank swap: Inferno Slice @ 3 stacks. Inferno Slice needs to be split with half of your raid group, so you need to stack up with them during the ability cast (you can’t stay stacked on top of them the entire fight, because…)
- Overwhelming Blows: This is a cleave ability on Gruul’s current target, and he will use it regularly. (This also applies a debuff that increases the damage it deals, but swapping at Inferno Slice will take care of that.)
- Basically, tank the boss facing away from everyone else. When he casts Inferno Slice, very quickly move on top of your designated raid group, then move back when it’s over. When not tanking, stay away from the front of the boss.
- Environmental Hazards:
- Overhead Smash. Gruul will occasionally drop ignore tanks and smash the ground.
- Crumbling Roar / Cave In. Gruul will cause a cave in; this is telegraphed by a white circle and, after a few seconds, falling rocks.
Extra Credit
- Use medium cooldowns for the second stack of Inferno Slice, and strong cooldowns for the third stack.
Brewmaster Tips
- Celerity is useful for rolling into a group for Inferno Slice and quickly out of the group, without running out of Rolls.
- Dampen Harm or Diffuse Magic the third stack of Inferno Slice.
 |
 |
 |
|
Overhead Smash telegraph
|
Overwhelming Blows positioning
|
Crumbling Roar telegraph
|
Oregorger
Key Mechanics
- Tank swap: After each Acid Torrent.
- Acid Torrent: Stand between the boss and the ranged group, active mitigation and defensive cooldowns will reduce the damage everyone takes.
- The boss doesn’t do anything of note to his current target, so your primary concern is Acid Torrent.
- During the Feeding Frenzy phase, kill ore boxes like the damage dealers, while avoiding the boss.
Extra Credit
- You will likely have no Resolve when Acid Torrent is cast, so you will either have to use shielding abilities (Guard, Shield Barrier) early, when Resolve is high, or cooldowns that do not depend on Resolve, like Dampen Harm or Barkskin.
- Acid Torrent is physical damage, but cannot be dodged or parried.
Brewmaster Tips
- Zen Meditation works to significantly reduce raid damage from Acid Torrent.
- Chi Explosion is useful for ranged dps. The boss doesn’t deal huge amounts of physical damage while you’re tanking him, so Serenity isn’t as important.
- Tiger’s Lust for quickly moving around during the Feeding Frenzy phase.
- Use Guard immediately after your co-tank taunts the boss, before your Resolve drops, so that it can block the majority of Acid Torrent when it is cast a few seconds later.
- Use Dampen Harm for Acid Torrents that you can’t use Zen Meditation or a high-resolve Guard against.
- Place Transcendence such that you can use it to escape the boss if he’s heading down your corridor durng Feeding Frenzy.
Blast Furnace

Key Mechanics
- Phase 1
- Each tank handles the adds on a side of the room, which one tank holding the mini-boss Foreman Feldspar.
- Tank adds near to the Bellows Operator, but not on top.
- Move adds out of Defense, cast by Security Guard.
- Environmental Hazards: Rupture, move out of the fire.
- Phase 2
- One tank can hold all the Security Guards away from the raid while the other tanks the Firecallers on top of whichever Primal Elementalist your raid is targeting.
- Phase 3
Extra Credit
- Interrupt Pyroclasm, cast by Foreman Feldspar in phase 1, to reduce damage.
- Interrupt Cauterize Wounds, cast by Firecallers in phase 2, to prevent healing.
- Phase 3 deals very high, sustained magic damage, and you may want to pick talents and plan cooldowns around that.
Brewmaster Tips
- Use Ox Statue to pick up spawning adds.
- Soul Dance is useful for the final phase, though not very useful for the first two phases.
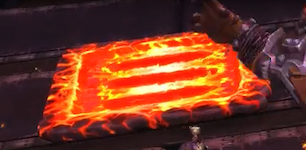
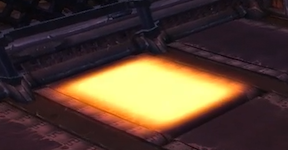
Hans’gar & Franzok
Key Mechanics
- Each tank holds one boss for most of the fight. Tank the bosses on top of each other for cleave. Occasionally each boss will leave, but no tank swaps are required on non-Mythic difficulties.
- Crippling Suplex: Use a defensive cooldown a few seconds before this ability is cast. You can’t use any abilities while it is in effect.
- Environmental Hazards: Searing Plates and Smart Stampers. Both will telegraph the impending area of death before they land, so you simply need to stand out of glowing areas.
Extra Credit
- Shattered Vertebrae, increases physical damage taken for 8 seconds, and is applied to each tank after each boss returns to the fighting space. You can use a cooldown or swap tanks for this, though it is a short duration so it doesn’t require any extreme reactions.
Brewmaster Tips
- Dampen Harm is useful against Crippling Suplex.
- Xuen to cleave off bosses.
- Roll ignores movement slowing effects, like the conveyer belts, so use it liberally to avoid environmental effects. Celerity may even be of use for this fight.
 |
 |
|
Searing Plates
|
Smart Stampers telegraph
|
Flamebender Ka’graz

Key Mechanics
- Ka’graz changes phases regularly throughout the fight. With the exception of Rising Flames, she only needs to be single tanked. Aknor is an add at the beginning of the fight, but besides tanking him and killing him early, there’s not much you need to worry about while he’s active.
- Cinder Wolves
- The one with Overheated (the larger one) should be tanked by whoever is not on the boss. The other cannot be tanked.
- Face away from the raid for Charring Breath. Use cooldowns for the second and third stacks of Charring Breath.
- Tank swap when the wolves swap Overheated (happens after the third Charring Breath).
- Rising Flames: Swap @ 4-5 stacks, or whenever your own stacks fall off.
- Environmental Hazards:
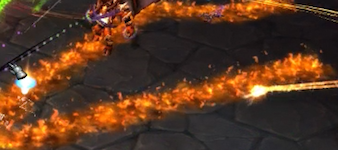
- Lava Slash, fire lines on the ground.
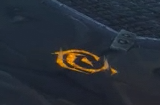
- Magma Monsoon: swirly circles on the ground, telegraphed before they land.
Extra Credit
- Tank the Cinder Wolf on the same side of the room as the other, to minimize Fiery Link damage. If possible, keep the boss and wolf within cleave range while facing away from everyone else.
- Use avoidance abilities while the boss applies Rising Flames debuff (appears as the buff Flameflury on the boss herself), to reduce the chance of each application.
Brewmaster Tips
- Xuen to cleave off the adds that occasionally pop up.
- Ox Statue to quickly pick up whichever wolf has Overheated when they spawn.
- Diffuse Magic or Dampen Harm for Charring Breath. Diffuse Magic will reduce the damage of a single breath significantly, while Dampen Harm can often cover all three breaths in a row, but for less reduction.
 |
 |
 |
|
Avoid Lava Slash
|
Charring Breath
|
Magma Monsoon telegraph
|
Kromog

Key Mechanics
- Tanks must stack at all times to split damage from Fists of Stone.
- Tank swap @ 2-3 stacks of Warped Armor, which reduces movement speed and increases physical damage taken.
- Stand inside a Rune of the Grasping Hand to avoid damage from Thundering Blows, and kill the hand before the boss needs to be tanked (which happens when he next casts Stone Breath).
- Slam – Deals less damage the further you are to the boss, so use fast movement abilities to get away from the boss and quickly return after the cast.
- Environmental Hazards: Reverberations, which are telegraphed by a golden circle (similar to sound waves on other bosses).
Extra Credit
- Communicate with your co-tank so that you’re always avoiding environmental hazards while staying stacked, or use strong cooldowns if you’re tanking and your co-tank runs away from you.
- Kromog will Frenzy at 30% health, increasing the damage he deals and the frequency of his special abilities. Save big cooldowns for this moment.
Brewmaster Tips
- With Touch of Death, you can kill your Grasping Hand very quickly.
- Use Transcendence and Roll to put some distance between you and Slam whenever he casts it.
 |
 |
|
Avoid Reverberations
|
Grasping Hand Rune
|
Beastlord Darmac

Key Mechanics
- The boss casts Call the Pack periodically throughout the fight, which summons many small adds that need to be picked up by a tank and killed.
- When Beastlord Darmac is not mounted, tank him near the next animal you wish to activate.
- Wolf Phase
- Rend and Tear: Offtank needs to stay away from current tank when this is cast, to avoid it spreading. Tank swap at 2-3 stacks, if necessary.
- Beastlord Darmac keeps this ability after the wolf is killed, so you will likely have to deal with it throughout the fight.
- Elekk Phase
- Tank swap: Crush Armor @ 2 stacks.
- Rylak Phase
- Tank swap: Seared Flesh @ 5-10 stacks.
Extra Credit
- You can avoid Rend and Tear by quickly moving away from your previous location after he charges into the raid. This phase can be single-tanked if enough are dodged.
- Tank the boss near the Pack Beasts spawn point whenever he is mounted, for cleave damage.
- Use avoidance abilities when tanking the Rylak, Dreadwing, to reduce the chance of stacking Seared Flesh.
Brewmaster Tips
- Use Ox Statue to pick up Pack Beasts.
Operator Thogar

Key Mechanics
- Environmental Hazards: Trains! Watch out for opening doors or use an addon to run off of tracks that will soon have a train. Also avoid Prototype Pulse Grenades.
- Pick up adds as they spawn from trains.
- Tank swap: Enkindle @ 2 stacks.
- When two trains come down the middle, each tank will have to run to a different side to pick up adds. One will have the boss.
Extra Credit
- Interrupt the adds’ Cauterizing Bolt
- Save cooldowns for tanking the boss while the groups are separated.
Brewmaster Tips
- Place Transcendence wisely to escape trains if necessary.
- Talents: Rushing Jade Wind for add pickup, Chi Explosion if you don’t need Serenity.
Iron Maidens

Key Mechanics
- Enforcer Sorka and Marak the Blooded need to be tanked. Admiral Gar’an can be maneuvered through taunts, but doesn’t focus attacks on her primary target.
- Marak the Blooded
- Intercept Blood Ritual / Crystalized Blood by standing between the spell’s target and the boss.
- While on the Dreadnaught, avoid Corrupted Blood pools.
- Sanguine Strikes: This ability only appears at the tail end of the fight. Use cooldowns and active mitigation to reduce the damage dealt while this buff is active on the boss, to reduce the damage the raid takes.
- Enforcer Sorka
- Blade Dash: The boss will charge away, deal damage to the raid, and deal the same damage to you on return. This isn’t significant damage, but a little active mitigation never hurt anyone.
- While on the Dreadnaught, intercept Deadly Throw.
- Dreadnaught phase: When the boss you’re tanking boards the nearby ship, follow it. As before, Admiral Gar’an does not need a tank to follow.
- Environmental Hazards:
- When you’re not on the ship during the Dreadnaught phase, you’ll have to dodge Bombardment Pattern Alpha and Omega. Telegraphed by red circles.
- Admiral Gar’an‘s final ability, Dominator Turret, will spit out projectiles that need to be avoided.
Extra Credit
- Help soak Admiral Gar’an‘s Penetrating Shot.
- Tank the bosses away from Dominator Turret, to allow more room to avoid the projectiles.
Blackhand

Key Mechanics
- Shattering Smash: Tank swap immediately after this ability lands. It clears threat, knocks back, and stuns.
- Phase 1
- Start tanking the boss near the edge of the room and spiral toward the center as Molten Slag appears on the ground.
- Environmental Hazards: Molten Slag, Demolition, telegraphed by brown swirls
- Phase 2
- New add, Siegemaker, fixates on a random player and cannot be tanked.
- A group of teammates will need to take advantage of the next Shattering Smash, so don’t away when the spell is about to be cast and don’t aim it into the whole raid.
- Environmental Hazards: Siegemaker’s Battering Ram, avoid the front of the add, and Blaze fire spread by the add should it stay alive too long.
- Phase 3
- Position the boss around the edge of the room, moving to avoid environmental hazards and positioning requirements for the following abilities:
- Throw Slag Bombs attaches a bomb that will explode in 5 seconds. Tank swap and run the bomb out of the raid.
- Massive Shattering Smash must now be split, meteor-style, among the raid. It still knocks back, so position the boss toward the center so that your raid isn’t knocked off the platform.
- Environmental Hazards: Slag Eruption and Huge Slag Eruption, big fire circles that are activated after Massive Shattering Smash.
Extra Credit
- Position yourself with a safe space behind you, such that Shattering Smash won’t knock you into environmental hazards or off the edge of platforms.