

This is a basic guide for tanks in Throne of Thunder, specifically from the perspective of normal 10 mans (if the 25 man strategies happen to vary significantly from those listed, please let me know). It isn’t intended to be a strategy guide or a resource for raid leaders. Instead, it just provides tanks with the information they will need to know in any given fight, like how many tanks are required and how many debuff stacks they need to swap at.
Table of Contents
- Jin’rokh the Breaker
- Horridon
- Council of Elders
- Tortos
- Megaera
- Ji’Kun
- Durumu the Forgotten
- Primordius
- Dark Animus
- Iron Qon
- Twin Consorts
- Lei Shen
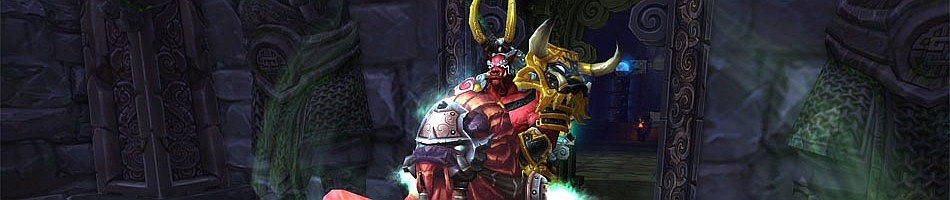
Jin’rokh the Breaker
Two tank fight. Swap immediately after Static Burst / Static Wound (even if you still have your debuff active). Position the boss so his rear is near or sitting inside a “good” puddle (i.e. one that is not charged with lightning) so melee can benefit from the buff it provides. Tanks must stay out of puddles themselves because the puddles amplify the damage done by Static Wound. During Lightning Storm, pull the boss to the middle and stay out of electrified puddles.
There’s lots of ticking raid damage, so use skills that help out raid healers if you can. As long as you taunt in a timely manner, there is not a significant amount of damage on the tank.
Trash Between Jin’rokh and Horridon
The floating trolls surrounded by blue light will bounce you back and into the air if you venture into their circles. They cannot be killed, so just avoid them. The first bridge pushes you to the right, so you have to run at an angle to avoid falling off. There are safe zones where the wind is blocked by torches. Pull one Tormented Spirit at a time from max range. They have a healing debuff that goes up to 90% reduced healing pretty quickly. Pull each one to the nearest safe zone and have your raid wait for you there. If the nearest safe zone is in the middle of the path of a floating blue circle guy, you’ll have to move when they come near. There are two you have to avoid, and sometimes you have to move a bit out of your way to avoid both.
Once past the first bridge, there’s a big stone boss who shoots lasers. We didn’t have a chance to really understand this mechanic, so we just let people die. It was still easier than the bridge.
The next bridge pushes you back and the safe zones are located at the sides (again, behind torches). These blue floaties path in a figure 8 and will run through safe zones, so pay attention to them when they get near and be prepared to move if they head for your safe zone. Again, continue to pull one Tormented Spirit at a time.
At the end of the second bridge is a mini-boss. He’s really easy and all he does of note is drop rain storms on random players. If you’re afflicted by a rain storm, stand away from the group. Once this boss dies, the wind on the bridge is gone. When you wipe on the next boss, you’ll still have to run through the bridges and avoid the blue floaties, but you can mount up and you don’t have to worry about wind pushing you off or Tormented Spirits.
Horridon
Two tank fight. One tank for the dinosaur and one for the adds that spawn from the gates. The dinosaur will put a stacking debuff, Triple Puncture on its target that increases the damage of the next Triple Puncture. Paladins can bubble this debuff off, but otherwise you’ll have to switch tanks. The ideal time to swap is after you bring down a gate and move on to the next, which should occur around 8 to 9 stacks.
When you’re on the boss, you should save big defensive abilities for high stacks of the debuff. The first few times he casts Triple Puncture don’t hurt, but near the end it gets a little dangerous.
When you’re picking up adds, keep in mind that there are two spawn points: one at the gate and one from the stands above. The adds that jump down from the stands are usually a higher priority for dps so try to pick those up first. You will likely need every ranged pulling ability and control tool at your disposal. Adds are susceptible to silence and disarm effects.
When the Dinomancer spawns, he just needs to be interrupted and can be picked up by either tank.
- Gate 1 – Farraki: The basilisks cast a stun so interrupt them. They have low health. Avoid sand pools.
- Gate 2 – Gurubash: This group does a lot of raid damage. Dispel the poisons if you are able. Interrupt the poison volley.
- Gate 3 – Drakkari: Warriors and champions are untankable, so you can ignore them. Pick up Frozen Warlords (who jump down from the stands). Warlords have a Mortal Strike that hits very hard, so you might need cooldowns once two or more are hitting you. Avoid Frozen Orbs.
- Gate 4 – Amani: Bears cleave so face them away from raid members. Interrupt Chain Lightning and Fireball. Avoid Lightning Nova Totems.
War-God Jalak
Whoever is not tanking the dinosaur should pick this guy up. Once he dies, you just have the dinosaur left. The dinosaur deals more damage, so swap more often if your stacks fall off.
Brewmaster Specific
Here are the talents and skills I used to pick up adds.
- Chi Wave – For burst healing and ranged pulling.
- Ring of Peace – All the troll adds can be disarmed and silenced. Remember that you can cast this on your co-tank while they’re picking up adds, as well.
- Dampen Harm – Primarily for the Drakkari Warlords’ Mortal Strike, but also useful for high stacks of the boss’s debuff.
- Rushing Jade Wind – For picking up ranged adds and AoE dps. Chi Torpedo would probably also work for add pickup.
- Transcendence – Useful for escaping dangerous ground effects or returning to a gate to pick up a fresh wave of adds.
- If you’re having trouble surviving the dinosaur attacks, try reforging to mastery.
- Detox – The Gurubashi and Drakkari cast poison and disease on the raid and you have access to a cheap dispel. This really helps out the healers.
- Ox Statue – Place at the gate or in the middle of the raid so that you can AoE taunt off of it when adds spawn.
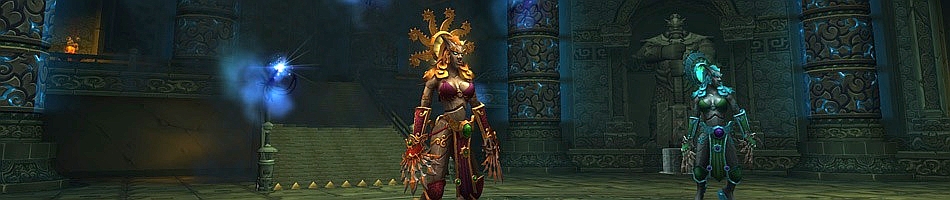
Council of Elders
Two tanks. One tank should be on Kazra (priestess) full time and one should be on Sul (sand guy) full time. Malakk (frost guy) should be tanked by the Sul tank most of the time, but swapped when Frigid Assault reaches around 10 stacks. The two tanks need to be on opposite sides of the circle in the middle of the room to give damage dealers more time to kill Loa Spirits summoned by the priestess.
Frigid Assault is a buff Malakk places on himself that gives his melee attacks a chance to afflict his target with the Frigid Assault debuff. After 15 stacks, the target will be stunned for 10 seconds (I was not able to remove this stun with any stun removal abilities). Avoidance abilities reduce your chance to be afflicted by one of these stacks, so save your dodge or parry active mitigation for this skill. You can also kite this boss to avoid stacks, if necessary.
You should try to organize an interrupt rotation on Sul’s Sand Bolt. The tank on Kazra should try to interrupt her Wrath of the Loa ability as well.
Tortos
This fight can probably be single-tanked, but it’s much easier to use two. One tank on the boss, one to pick up bats. The boss tank has to worry about Quake Stomp, which deals 30% of your health in damage, and Snapping Bite, which deals significant tank damage. Snapping Bite damage is reduced by armor. The bat tank needs to maximize their health pool (stamina trinkets, stamina flask, etc) to reduce their chances of dropping below 550k health and dying from Drain the Weak. The bats deal light damage when you’re above 550k, but will very likely kill you if you drop below that number.
For the boss tank, the only thing you really care about is minimizing damage taken by Snapping Bite. For the add tank, you have to pick up adds quickly and keep your health high. Self healing, AoE stuns, and ranged AoE tools are great for this.
Brewmaster Specific
- Charging Ox Wave – Useful for picking up bats. They often are at range and later in the fight they spawn too quickly to be able to use Leg Sweep on every pack.
- I found both Zen Sphere and Chi Wave useful so that choice is up to you.
- Glyph of Breath of Fire – For disorienting bats. I’m not 100% sure this was effective, but you don’t really have any other necessary glyphs on this fight so it’s worth a try.
- Clash – Another ranged stun for bats. Sometimes it’s hard to land because of the minimum range, but it’s really useful if you manage to catch the whole group with the stun.
- Use a target macro (/targetexact Vampiric Cave Bat) and Crackling Jade Lightning to find the bats. They spawn from the ceiling and slowly fly down, which makes it difficult to spot their angle of approach.
- I found Healing Elixirs more useful than Dampen Harm as the bat tank, though both are viable.
Trash Between Tortos and Megaera
Kill the 3 Eternal Guardians (transparent mogu) and click bells behind them. They are located around the edges of the busiest level of the cavern. The stone worms hit really hard so they should be prioritized. The mushrooms also deal damage once you step on them, so as a tank it’s your responsibility to step on all the mushrooms before the rest of the raid does.
Megaera

Two tank fight. There are basically two phases: in the first phase, there are two heads up and each one should have a tank; in the second phase, the heads can’t be tanked and deal raid-wide AoE damage.
Each head breathes in a cone and must be faces away from the raid. These breaths have different effects depending on the head:
- Venomous Head: Rot Armor. Nature damage that increases all damage taken. Stacks. Due to the debuff, deals increasing physical damage.
- Flaming Head: Ignite Flesh. Fire damage that leaves a DoT. Stacks. The DoT is quite a lot of magical damage and is dangerous at high stacks.
- Frozen Head: Arctic Freeze. Ice damage that has no side effects until you reach 5 stacks, at which point you’re stunned for 20 seconds. This boss deals the least damage because its debuff is only dangerous at 5 stacks.
You can swap tanks after 2 or so stacks of each debuff, but we found it easier to swap only after a head died and the phase changed or if dps was slow and the tank on blue was at 4 stacks (because 5 would leave them stunned for a long time).
At the end of the AoE healing phase, you have to note both tanks’ debuffs and be careful not to tank a head that you already have debuffs from. We also put me (a brewmaster) on the Red head as much as possible because I was much better at handling magic damage than my co-tank (a DK). Sometimes, due to debuffs remaining from the previous phase, we would let the DK take one stack of fire and then swap.
The dangerous damage in this fight is almost entirely magical, so glyph and talent in any way you can to reduce magic damage. I used stamina trinkets and flask. The non-tank phase is heavy on AoE damage, so you also want to bring raid heals and raid cooldowns.
Brewmaster Specifics
Depending on your raid’s dps, you can use a cooldown for nearly every breath. This is the priority I followed:
- Guard for every other breath.
- Diffuse Magic when Guard was not available.
- Fortifying Brew if Guard and Diffuse Magic weren’t available. Most effective on Green Head.
- Zen Meditation if Guard and Diffuse Magic weren’t available. Most effective on Red Head.
- If you have to skip a cooldown, do it on the first breath of a phase because that’s the easiest to survive with just self heals.
Here are some other tips:
- Glyph of Guard because of the heavy magic damage.
- Chi Burst is incredible for raid healing. You can afford to use it early as a self heal as well, but when the AoE phase is approaching you should save it to use on the raid.
- Transcendence and even Glyph of Transcendence are useful for quick tank swaps.
Trash between Megaera and Ji-Kun
The snails will one shot you at a moment’s notice, so don’t bother trying to damage them in melee range. You need to spread out for the spiders because their web attack hits everyone in a small range and it’s not good when the whole raid is webbed. The swarms of insects can’t be tanked and deal more damage the further away you are. There are roving pockets of pollution that will damage you if you’re caught inside.
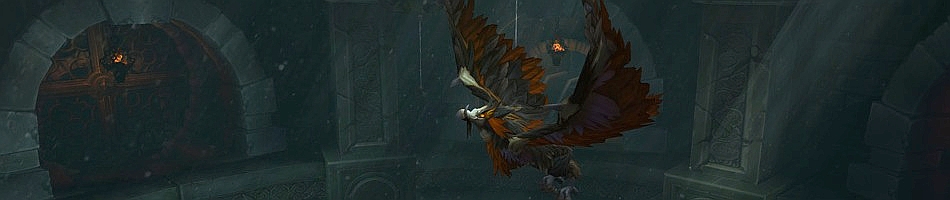
Ji-Kun
For tanks, this fight is Blade Lord Ta’yak 2.0. Two tanks, swap after two stacks of Talon Rake. The boss casts Talon Rake immediately after Quills and Down Draft and it has a castbar, so keep an eye out and be prepared with active mitigation or cooldowns. She also applies Infected Talons but that DoT is fairly insignificant. Outside Talon Rake, the boss deals very little damage to the tank. The raid is usually very spread out, so any raid heals or cooldowns need to have a wide range and reduce physical damage to be effective.
Down Draft pushes you back very quickly and threatens to push you off the edge, so you need movement abilities to combat it. If you’re tanking after a Down Draft, you need to be the first player to return to melee range or else the boss will Talon Rake whoever gets there before you.
If you’re bored while not tanking the boss, you can soak up Feed Pools on the ground. They deal a fair amount of nature damage, so make sure this is okay with your healers or you have a magic-absorbing cooldown up first. This just helps keep the platform clear and is not necessary.
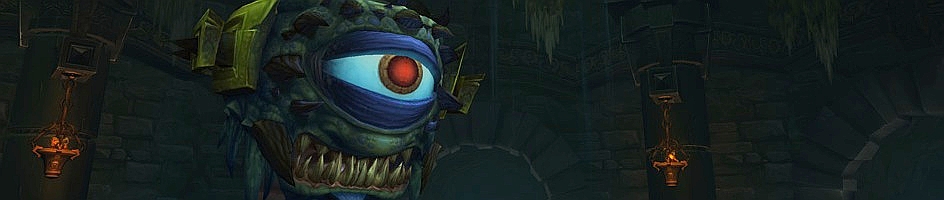
Durumu the Forgotten
Two tanks. Boss will not move from the middle of the room. Swap at around 5 stacks of the debuff Hard Stare or when your debuff has fallen off. In addition to hitting very hard, it applies two debuffs: Serious Wound, which reduces healing taken, and Arterial Cut, which is a stacking bleed that falls off when you’re healed to full. Once you reach 4 or 5 stacks you may need cooldowns to survive. Abilities that heal you quickly are useful, as are proactively-used absorbs. You have to rely on your healers to quickly top you off before the bleed becomes too dangerous, but try to help them out as much as possible.
The boss has a ridiculously huge hit box, so if you are the target of Lingering Gaze, try to run to max melee range and drop the void zone in the middle of the room. Also be aware of the purple stuff on the ground, Force of Will because it will knock you back and kill you.
When the rays of light appear, tanks will need to help soak them because three people need to be in each of the three beams. The boss still needs to be tanked in this phase.
During the Disintegration phase, stay out of the bad stuff on the ground (easier said than done). The boss is untankable in this phase, so this is a chance for your stacks of Serious Wound to fall off. The Disintegration maze can be difficult to master, but there are some things you can learn beforehand: 1. While the boss is charging his laser, purple sparklies will appear on the ground. These indicate the save zone you should head for, and you should go for the far edge and wait. 2. Especially early on in the phase, you have to be very patient and not move into dangerous Eye Sores if you worry about getting hit by the laser. A safe path will not appear until the laser looks like it’s about to reach you. Don’t panic.
After the first Disintegration phase, the boss will start to cast Life Drain. The current off tank should help soak these, and it’s best if you rotate 2 or 3 people in and out. You will get stunned once you intercept the beam, so the current main tank should avoid these. He will continue to cast this, even into the next Light Spectrum phase, so be aware that you need to intercept it even while soaking beams.
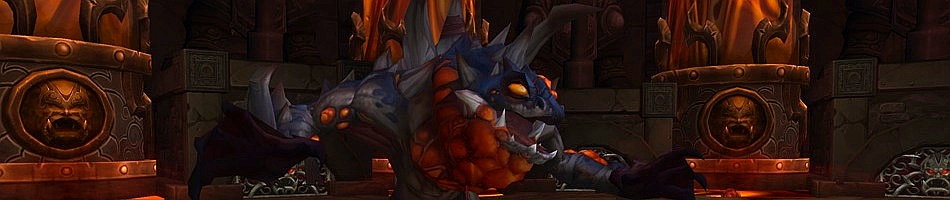
Primordius
Two tanks. Swap at around 6-8 stacks of Malformed Blood, except for the beginning where you want to swap at one stack so that you can send a tank out to kill oozes with the damage buff it provides. This debuff applies a stacking nature damage DoT that gets quite dangerous at high stacks, so magic or damage-over-time mitigation is helpful. Other than that, the boss will cleave with Primordial Strike so he needs to be pointed away from the raid.
Occasionally, ooze adds will leave behind purple Volatile Pools that slowly move toward the boss. They heal Primordius so they must never reach him, and you’ll have to slowly move the boss around the room to avoid them. Also, sometimes Primordius will not move quickly because he is casting, so keep him far enough away from the Volatile Pools that he won’t soak them up even if he stops to cast. To avoid spawning Volatile Pools very close to the boss, you should be careful not to kill oozes that are about to reach him and watch your cleave damage.
When you’re not currently tanking the boss, you should be killing Living Fluids and absorbing the red pools they drop. (Do not absorb the purple pools). Your goal is to absorb 5 pools so that you can become Fully Mutated before your Malformed Blood stacks fall off. Once you are fully mutated, dps the boss and taunt once Malformed Blood falls off.
Trash Between Primordius and Dark Animus
In Dark Animus’s room, you’ll see six mogu channeling. Three have glowing hands, and three have normal hands. One tank should pick up the glowing hand mogu and the other should pick up the remaining three and each group should be separated. The glowing-hand mogu will cast a spell that deals damage to everyone more than 30 yards away and the rest will cast a spell that deals damage to everyone less than 30 yards away. The raid should stack on the long-range, glow-hand, casters and kill them first before moving on to the short range casters. These spells can be silenced and interrupted.
Dark Animus
Two tank fight. Strategies vary greatly for this fight (especially for 25 man), but generally both tanks will pick up two small Animal Golems and pull them next to a critically damaged medium-sized “Large Anima Golem” for the dps to kill. When you have two small golems on you, they will deal significantly increased damage and it’s a good idea to use a big cooldown once they start attacking you. Be careful not to cleave too much damage into the critically damaged golem that you’re dropping anima into.
Once two small golems are killed and have given their anima to the nearest deactivated medium golem, taunt a spare small golem off of another player and pull it to the big Massive Anima Golem. This golem will activate and start attacking you once a single small golem has dropped its anima into it, but it will still need many more golems to be “full”, and you want it to be full before activating the boss. The Massive Anima Golem applies a tank swap debuff, Explosive Slam, and you should try to swap around 5 stacks. Explosive Slam is an AoE effect that is centered on the current tank, so the tanks should be more than 9 yards apart. To fill up the Massive Golem, taunt small golems off of other players and the raid should kill the small adds once they reach the Massive Golem. Once all the active smalls are dead, start pulling the Massive Golem to critically damaged golems and kill those when it’s near. Once the Massive Golem is full, kill the critically damaged golem closest to the boss and he will activate.
To be clear, the strategy should follow these guidelines:
- Kill two small golems next to two critically damaged Large Golems (for a total of four)
- Pull and kill smalls to a single Massive Golem and use that Massive Golem to soak up remaining active and some inactive smalls (for a total of 8). DPS should only ever kill smalls.
- Once the Massive has a full 32 anima, activate the boss by killing a single small golem near it.
Both the Massive Golem and the Dark Animus will be active for the rest of the encounter, and your raid should put all its damage into the boss. Tanks will continue to swap around 5 stacks of the Explosive Slam debuff, and continue to stand at least 9 yards away from each other. The key ability the boss uses that tanks need to worry about is Anima Ring. He will spawn a circle of orbs around the main tank that quickly converge on the tank. A damage dealer should run in and soak some of those orbs, otherwise they will hit the tank and the boss will deal deadly melee damage to him. You can use Transcendence or other teleportation skills to escape it as well. You should also be aware of Interrupting Jolt, which the boss starts casting at 75 anima and will require your healers to stop casting for a few seconds.
Iron Qon
This is the most boring encounter for tanks since Cata, but it still requires two. Swap around 4 stacks of Impale, or whenever your stacks fall off. You can also easily single-tank it if you are a paladin or have a paladin raid member who’s specced into Clemency. Beyond the swap, you’ll have to do the same things as the rest of your raid: stack with your assigned group at the appropriate times for Unleashed Flame, avoid the elemental lines on the ground, and run away from tornadoes.
If the tornado phase is your most difficult one, you might want to talent into speed increases and teleports (though Transcendence, even glyphed, seemed to be too short range to work properly). The tornados deal nature damage and reduce healing done to you by 80%, so absorbs and magic-reduction cooldowns are useful.
If you want to spice things up a bit, you can try to game Vengeance while not tanking and stand in the elemental lines with a cooldown or absorb active. However, be aware that the storm spear lines will stun you after 3 stacks and the ice spear lines will reduce your attack speed by 25%.
Twin Consorts
Two tank fight. For the first phase, only Lu’lin, the blue one, is truly active. A minute or so into the fight she will spawn a Beast of Nightmare on her current target, which should prompt a tank swap. If anyone heals the afflicted tank, they will receive a stacking debuff, Corrupted Healing. This will kill your healers, so let them know to not heal you. Death Strike heals will not trigger this effect, but other heals like Expel Harm and Chi Wave will trigger it, so try to avoid them. Instead, use avoidance and absorbs to keep yourself alive while killing the add. Only the afflicted tank can target and kill their add.
Eventually, Lu’lin will disappear and Suen, the yellow one, will be the only tankable boss. She will apply the Fan of Flames debuff to her current target and you should tank swap around 3 stacks. While tanking, you need to pull her to the blue Ice Comets that spawn around the room to remove Blazing Radiance, a stacking damage buff the boss applies to herself. You can also try to stand in the Icy Shadows of the comet to reduce fire damage done to yourself (the application of Fan of Flames hurts quite a bit), but it’s not necessary.
After the day phase, both bosses will be tankable. Neither applies their tank swap mechanic (Beast of Nightmare or Fan of Flames ), so you shouldn’t need to swap and each tank should just stick to one boss. You will need to move Suen around to ice comets, like before. Lu’lin will occasionally become immune to damage and won’t need to be tanked, so if you’re tanking her you can put damage into Suen at this time.
Once Suen dies, the rest of the fight is just like the first phase, and she will start casting Beast of Nightmare again.
During the fight, if one of your teammates manages to summon aid from the Crane, a dozen or so spectral cranes will run across the room and you should try to put the boss’s in their path because they deal damage.
Lei Shen

Two tank fight. Each phase has a different tank swap mechanic. There are three phases separated by two intermissions. Besides the debuff swaps, tanks also need to be aware of most other mechanics as well as moving the boss at the right time.
Phase 1
Swap immediately after Decapitate is applied. The tank with the Decapitate debuff should run away once the swap has happened: the further away you run, the less damage you take from the impending Decapitate. You don’t have to go very far, 30 or 40 yards is fine, and you can return once you take the hit. The debuff also increases melee damage taken, so don’t bother swapping until the next application. The boss also puts bad stuff on the ground near melee, which is easy to avoid. If the blue circle denoting Thunderstruck is close to you (less than 20 yards away for tanks), you should move further away. It’s not a huge concern for tanks and it will usually be far enough away that you don’t have to worry. All of these skills will continue to happen throughout phase 1.
There are four pillars in the room, and each one gets charged by Lei Shen when he is near. Most raids will want to start on East and let it get the closest to full without actually filling, then go clockwise to south, west, and finally pushing the boss while at north. To do this, tanks need to be on their toes and move the boss at the right time. To fill up East pillar to around 90 energy, start moving toward South at 75-80 energy. For the other pillars, start moving around 65-70 energy so that they will be around 80 when the boss leaves their range.
Each pillar grants the boss a unique ability, though most of these abilities do not target tanks. The one you do need to look out for is South’s Overcharge, which stuns you unless you can run to the safe zone. The stun is short and dispellable, so if you are too far away to reach the safe zone you can just use some active mitigation to eat it or dispel the stun yourself. For West platform, you can help your raid soak Bouncing Bolt, which leaves a blue circle on the ground that needs to be intercepted before the projectile lands. If one of these projectiles hits the ground, you should pick up the adds that spawn.
Once the boss reaches 65%, the first intermission begins. The boss casts all of his special pillar abilities, but none of them effect tanks so you have it pretty easy. Your raid will likely assign two people to each corner and you should focus on intercepting Bouncing Bolts and taunting adds should people fail to intercept their bolts. You should also stand on top of nearby raid members should they be inflicted by Overcharge.
Phase 2
Much like Phase 1, but Decapitate is gone. Instead, you want to swap immediately after the application of Fusion Slash. Fusion Slash knocks you back a long distance so you should have your back to the center of the platform. If you get knocked off the platform, it’s a very embarrassing death that your raid will not be able to recover from. You will also have to look out for Lightning Whip, which is a cone effect that deals deadly damage. It’s easy to avoid, though it often occurs a few seconds before Fusion Slash so don’t put yourself in a place where you can get knocked off the platform.
There’s also Ball Lightning that spawns on all non-tanks. You don’t have to worry about it except that you should try not to stand on other people when it’s about to land (because it deals splash damage). These adds charge randomly and cannot be tanked.
The next intermission is much the same as the first, except it’s easier because you have one less quadrant to cover.
Phase 3
Tanks should swap around 10 to 12 stacks of Overwhelming Power. This ability is a stacking nature DoT, so any magic reduction is useful. The boss casts all of his abilities that were not specific to a pillar during this phase: Thunderstruck, Ball Lightning, and Lightning Whip. In addition, he will periodically spawn wind that threatens to push you off the platform. The wind is not terribly hard to master, just stay away from the edges.