
This guide is the distilled essence of what is needed for tanks to jump into their first few attempts of bosses in Highmaul. You won’t find any in-depth strategies here (though you might find them here). Instead, you’re going to get just enough information to wrap your head around the encounter; a trickle of strategy, not a firehose. This guide is ideal for those attempting LFR and Normal Highmaul, though the mechanics are identical to Heroic Highmaul (if only requiring a more in-depth knowledge of what’s going on).
This guide is essentially the same one that I posted to Wowhead, except with more Brewmaster-specific information.
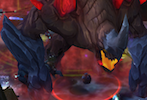
Kargath Bladefist

Key Mechanics
- Tank Swap: Impale (the attack) / Open Wounds (the debuff) @ 2 stacks. Or you can simply swap as Chain Hurl ramps up.
- Chain Hurl: The boss spins and eventually throws a handful of the closest people to him into the stands. If you’re not currently tanking the boss, stand next to the boss during the cast.
- While in the stands: Pull as many mobs as you can, until you get tossed back into the arena.
Extra Credit
- Use proactive mitigation or minor cooldowns for Impale, especially the second one.
Brewmaster Tips
- Ox Statue is fantastic in the stands.
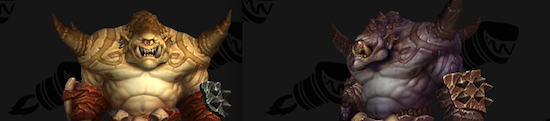
The Butcher

Key Mechanics
- Tanks stand on top of each other to split the damage on the current target (Heavy Handed). You’ll have to react to damage the entire fight, not just when you’re tanking.
- Tank Swap @ 2-3 stacks of The Tenderizer (i.e. taunt when your stacks reach 0)
Extra Credit
- The Cleaver does not apply its DoT if you dodge or parry the attack. Keep up avoidance mitigation abilities to reduce the damage when targeted by the boss.
- The boss will Frenzy at 30% health, increasing damage significantly. Save major cooldowns to stay alive for the rest of the fight.
Brewmaster Tips
- If possible, try to save Elusive Brew for when you’re actually tanking the boss. This reduces the chance for The Cleaver to apply its DoT.
Brackenspore

Key Mechanics
- Face boss away from raid because of his frontal cone attack, Necrotic Breath, but position near a Rejuvenating so that ranged and maybe melee can get the dps buff.
- Necrotic Breath: You cannot heal or be healed for the 5 second duration of the channel, so you must rely on shields, avoidance, and damage reduction cooldowns.
- Tank swap: 4 stacks of Rot
- Tank not currently on the boss should pick up Fungal Flesh-Eater add, which spawns near the water, and interrupt Decay.
- Environmental effects to avoid: Creeping Moss (green stuff on the ground)
Extra Credit
- Use proactive mitigation or a minor cooldown before or during the Necrotic Breath cast. Necrotic Breath deals magic damage, though the boss will also melee you during its effect.
- Stand near the green Living Mushroom for additional healing.
Brewmaster Tips
- Diffuse Magic is effective against Necrotic Breath.
- Glyph of Guard is not recommended because of the prevalence of physical damage throughout the fight and because the boss still melees hard during Necrotic Breath.
- Speaking of the boss meleeing during Necrotic Breath, this means Zen Meditation is not very effective.
- Xuen for cleaving onto the add.
 |
 |
 |
|
DPS Mushroom
|
Healing Mushroom
|
Fungal Flesh-Eater add
|
Tectus

Key Mechanics
- Before the boss breaks apart:
- One tank will be on the boss
- One tank will be responsible for picking up the orc adds and pulling them away from the boss. Distance will increase your chances of intercepting Gift of Earth, cast by the smaller add. Also face the small add away from the raid.
- After the boss breaks apart, tanks should split the new mobs evenly between them (first there will be 2, then 8). There won’t be any more orc adds.
- Environmental effects to avoid: Faultline, Earthen Pillar, Fracture (basically run out of rumbling earthquake spell effects, red and brown)
Extra Credit
- Tanking the mobs apart and spreading them equally between tanks makes your melee damage dealers lives much easier, since there are fewer nearby Fractures to dodge.
- Your ranged group will likely be moving around the room quite a bit for Earthen Pillar, so be sure to stay within 40 yards of them.
Brewmaster Tips
- As always, Ox Statue is helpful for picking up adds.
- Xuen is strong for targeted cleaving.
 |
|
Stay away from red Faultline.
|
Twin Ogron
Key Mechanics
- One tank on each boss for the entirety of the fight, very close to each other as much as possible.
- Phemos: At 33 energy, he will cast Whirlwind. At around 25 energy, you should move the boss out of the raid group so that no one but you is troubled by the damage.
- Pol: Move away from the front of the boss to avoid Shield Charge.
- Environmental effects to avoid: fire on the ground.
Extra Credit
- If tanking Phemos, make sure a healer is in range to heal you as you move around for Whirlwind. Also try to have a minor cooldown up.
Brewmaster Tips
- Xuen to cleave off both bosses.
- Transcendence is helpful for quickly moving Phemos away before Whirlwind.
 |
 |
|
Stay away from fire.
|
Phemos’ Whirlwind
|
Ko’ragh

Key Mechanics
- Tank swap: Expel Magic: Arcane
- Tank with Expel Magic: Arcane needs to immediately run away from the raid because you’re dropping little pools of magic that will explode in a few seconds and deal damage to anyone within 5 yards. Just keep moving around the outside of the room until the pools stop dropping.
- Pick up Volatile Anomolies and when they’re about to die, drag them into Suppression Field. (If they die outside of a Suppression Field, they’ll deal significant raid damage.)
Extra Credit
- Expel Magic: Fire – Spread out a little bit (5 yards)
- Save some active mitigation or cooldowns for Expel Magic: Shadow, since healers may have reduced ability to focus on the tank while recovering.
- Stay out of the Caustic Energy rune the boss drops after Nullification Barrier. He knocks you away before casting it, and it can be tempting for a tank to quickly return to boss range, but someone other than a tank should be the only one in that rune.
Brewmaster Tips
- Ox Statue helps pick up Volatile Anomolies. You can even place it inside a Suppression Field, though it’s likely it will lose threat before they die.
Imperator Mar’gok

This fight looks exceptionally complicated on the first glance. It is a step above everything else in this raid, but in practice there are only a handful of abilities tanks need to care about.
Key Mechanics
- Key phase abilities: These gain additional effects with each phase. The additional effects do not stay around in following phases.
- Mark of Chaos: Casted ability placed on the current tank that will explode in 8 seconds and deal significant damage to anyone in 35 yards.
- Arcane Aberration: Summoned add that needs to be tanked.
- General Tanking Strategy
- Tanking assignments: One tank with quick mobility (e.g. Transcendence, sprints, etc) should pull and handle all the Mark of Chaos debuffs. The other tank should handle the Arcane Aberration add.
- Tank swap: First swap immediately after Mark of Chaos is cast, second swap when an Arcane Aberration spawns.
- Environmental effects to avoid: Arcane Mines (giant purple runes on the ground)
- Phase 1: Unmodified abilities
- Mark of Chaos: Move away from the raid quickly before the bomb on you explodes.
- Arcane Aberration: Pick up the add and kill it.
- Phase 2: Displacement
- Mark of Chaos: Displacement: Teleports the target to a random location (usually on top of the raid). Use a movement boost to run at least 35 yards away from the group.
- Arcane Aberration: The add will knockback everyone nearby on death, so you’ll have to position him in such a way that you and the melee aren’t going to be knocked into a mine.
- Intermission 1: Just little adds and mages
- Pick up Volatile Anomoly adds. Depending on your raid’s strategy, it’s likely they will not die quickly, so there will be many up at the end of the intermission. Tanks should share the load to reduce damage.
- When a Volatile Anomoly dies, it deals raid damage. For this reason, they should be single targeted and cleaved, but not killed all at once.
- Phase 3: Fortification
- Mark of Chaos: Fortification: Roots the target in place. There is a 2 second cast that gives you some time to move away before it lands, but if you’re still close to the raid when it lands then everyone else will have to move away.
- Arcane Aberration: Has much more health and can no longer be stunned or otherwise controlled.
- Intermission 2: Same little adds and mages, plus a big add
- Gorian Reaver: Spawns at the entrance and needs to be tanked. Tank away from the mages because if it’s too close they’ll buff its damage.
- Taunt swap after a tank gets knocked back from Kick to the Face (fits in nicely with Crush Armor debuff)
- Pick up little adds as you did before.
- Phase 4: Replication
- Mark of Chaos: Replication: Shoots out slow-moving orbs after detonation. You can handle this the same way you handled the unmodified version: run to a distant corner and stand there until it explodes. Everyone else will have to deal with avoiding the orbs.
- Arcane Aberration: Splits into smaller adds on death, which the tank will have to pick up.
Extra Credit
- Accelerated Assault: The boss gains this buff that increases his damage whenever a melee hit successfully lands. Avoidance mitigation is key for keeping this buff from getting too high too quickly. It will reset on tank swap.
- Position Arcane Aberration near the boss so melee can cleave.
- If you are the tank handling Arcane Aberrations you should pick them up without a taunt, since you’ll need to save your taunt for the boss.
Brewmaster Tips
- Transcendence is really good for getting Mark of Chaos out of the raid quickly. Even during the Fortification phase, you can cast Transcendence during the boss’s 2 second Mark of Chaos cast and be out of the raid before the root lands.
- Tiger’s Lust is also helpful for running out of the raid with Mark of Chaos, especially during the Displacement phase when you’re teleported to a random place.
- Ox Statue helps with picking up intermission adds.
 |
 |
|
Stay away from Arcane Mines.
|
Small intermission adds
|