
Here is the information you need to know as a tank for all 14 encounters in Siege of Orgrimmar. I won’t cover the mechanics that don’t concern tanks for simplicity’s sake, so if you’re looking for a raid-wide strategy then sadly this is not the place. (Icy-Veins should cover your needs in that department.) For the most part, this guide should apply to LFR, Flex, and Normal difficulties, and tell you things like when you should taunt and where you should tank stuff.
Table of Contents
- Immerseus
- The Fallen Protectors
- Norushen
- Sha of Pride
- Galakras
- Iron Juggernaut
- Kor’kron Dark Shaman
- General Nazgrim
- Malkorok
- Spoils of Pandaria
- Thok the Bloodthirsty
- Siegecrafter Blackfuse
- Paragons of the Klaxxi
- Garrosh Hellscream

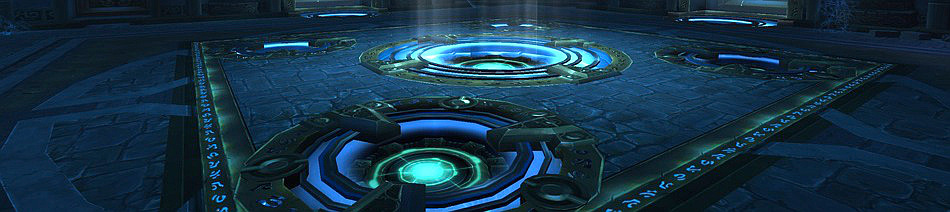
Immerseus
- Taunt swap after Corrosive Blast (1 stack)
- Corrosive Blast hits fairly hard.
- Both tanks must stand in different quadrants to avoid getting hit with the same blast. The markings on the floor are a good indicator.
- You will likely be out of range of most of your healers, so be prepared to be self-sufficient with your own heals or damage mitigation.
- During the add phase, you can’t tank the adds but you can snare, stun, and kill / heal them. The dark adds should be easily killable by a tank. If you have heals (like Healing Sphere) you can also help to top off the healable adds.
- Avoidables:
- During the water spout ability, run to melee range to avoid the damage.
- Run away from little spouts on the ground.
- You will periodically drop void zones on the ground. Drop they all close together so you have lots of safe space.
- Suggested Brewmaster talents: Xuen, Chi Wave, Charging Ox Wave or Leg Sweep
The Fallen Protectors
- Rook Stonetoe (the brewmaster) and He Softfoot (the rogue) each require tanks. Sun Tenderheart (the priest) cannot be tanked.
- Rook Stonetoe attacks his tank with Vengeful Strikes, which stuns for 3 seconds and deals a large amount of damage. This is a cone attack, so he must be faced away from the raid.
- He Softfoot has an ability called Gouge. If you are tanking him, you must face away during the cast to avoid the incapacitate. If he incapacitates you, he will fixate on a random target, and the other tank should quickly taunt him to recover the situation.
- When He Softfoot activates Instant Poison or Noxious Poison, use an avoidance ability if you have it. Instant Poison deals extra damage if it lands and Noxious Poison drops puddles on the ground that you need to avoid.
- Sun Tenderheart does not need to be tanked, but when she casts Calamity you should have more than 30% health.
- Rook Stonetoe’s Desperate Measures: At 66% and 33% health, Rook will summon 3 adds.
- Misery should be tanked away from the raid because it drops void zones.
- Gloom and Sorrow can be tanked together. Gloom needs interrupts.
- He Softfoot’s Desperate Measures: At 66% and 33% health, He will place a Mark of Anguish on a non-tank raider. Depending on your strategy, this may not concern you, but you should be prepared if your raid decides to throw the Mark to a tank. The Mark of Anguish will root you, though you can still attack. It will leave you with a significant 2 minute armor debuff.
- Sun Tenderheart’s Desperate Measures: At 66% and 33% health, Sun will summon lots of adds and a bubble that reduces damage from her Dark Meditation. The adds outside the bubble cannot be tanked, but you can help AoE the adds in the middle. Tank Rook and He inside the bubble, but be aware that they still perform Vengeful Strikes and Gouge during this phase.

Norushen
- Taunt at 3 or more stacks of Self Doubt.
- Pick up the big sha adds, Manifestation of Corruption, when they spawn.
- When the big adds die they will leave behind a purple sphere. Someone needs to stand on top of this sphere to absorb the corruption. Hopefully the person who is assigned to purify their corruption next should pick it up, but if no one is there you should do it. Otherwise, it will deal periodic AoE damage to the raid. Picking up the corruption will reduce your dps, and you cannot pick up corruption if you’re Corruption meter is already at 100.
- Should you be ported to the Purification chamber (either by clicking on the golden orb or being automatically ported in LFR), you will have to solo a single monster. You will stay in that room until you kill the monster or after 1 minute has passed. To survive, you need to,
- Run out of the frontal cone (Titanic Smash)
- Interrupt Hurl Curruption
- Use avoidance abilities (if you have them) for Piercing Corruption, which cannot be absorbed but can be avoided.
- Burst of Corruption does AoE damage to the raid. There’s nothing you can do about it except kill the add fast enough so he doesn’t cast it much.
- Once out of the purification chamber, use your dps cooldowns while you have no corruption.
- Suggested Brewmaster talents: Xuen (while there are a lot of adds, it’s rare that they group up enough for Rushing Jade Wind to be effective)
Sha of Pride
- Positioning: Tanks will likely be on the opposite side of the room as everyone else, and standing near (but not on) the prison areas.
- Wounded Pride – Taunt immediately after this debuff is applied to other tank. Otherwise, the other tank will gain unnecessary Pride.
- Corrupted Prison – Tanks cannot be imprisoned, which makes them perfect for unlocking those who are. Stand near (but not on) the switches before Corrupted Prison is cast.
- Adds: The various adds that spawn don’t need to be tanked, but if you’re currently not tanking then you can run over to the raid and help them with killing everything.
- Swelling Pride: Assuming quick taunt swaps, you shouldn’t get very high values of Pride. However, if you do then you’ll have to react much the same as the rest of the raid.
- 25-49 Pride: Run out of void zone(s)
- 50-74 Pride: Stand in your marked void zone
- 75-99 Pride: Stand away from raid.
- 100 Pride: Damage increase, mind control next time Swelling Pride is cast.
- Suggested Brewmaster talents: Xuen, unless you’re regularly within range of the raid to AoE the adds down with Rushing Jade Wind
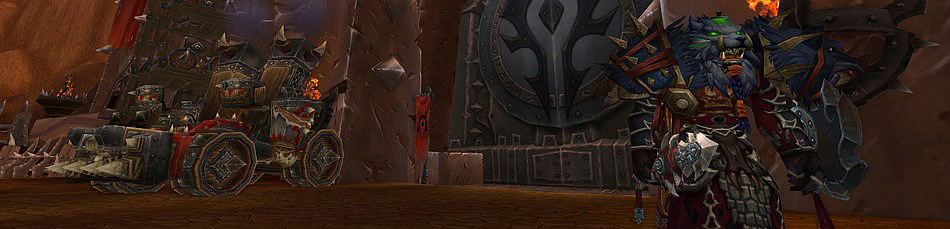
Galakras
- The first phase, which includes many waves of orc adds and scaling the towers, is an AoE fest, so bring all your AoE tools with you.
- On the ground:
- Bonecrushers will occasionally target an NPC and cast Fracture, which deals a deadly amount of damage to them. The encounter will end if one of the important NPCs dies, so you must quickly stun and taunt the Bonecrushers. Be aware that sometimes they will target Varian, who is standing in the melee and it’s hard to notice when he’s being attacked. Clash is pretty good for this.
- Tidal Shaman need to be interrupted and will likely be the primary target, as are their Healing Tide Totems.
- Miniboss Korgra: Avoid Poison Cloud on the ground; she’ll place a stacking debuff on tank.
- Miniboss Thranok: Point away from the raid because he cleaves; run out of his circular AoE effect.
- In the towers:
- Once the demolisher tanks are dead, you can take a group up the tower. Run all the way to the top of the tower without stopping, while trying to pick up the three or four mobs on the way.
- Each tower has a mini boss. Both have a cone effect that will knock you off the tower should you get caught. I recommend tanking each boss to the side of the tower so that when they run toward the center you know they’re about to cast their knock-back.
- When both towers are destroyed and Galakras is shot down, Phase 2 will begin. One tank needs to pick up the dragon and position it so that its side is to the raid. The other tank needs to stand away from the front of the dragon and away from the raid, to avoid gaining stacks of Flames of Galakrond.
- Tanks need to swap at around 3 stacks of Flames of Galakrond.
- Suggested Brewmaster talents: Rushing Jade Wind, Chi Burst for AoE damage, Charging Ox Wave or Leg Sweep for interrupting Fracture.
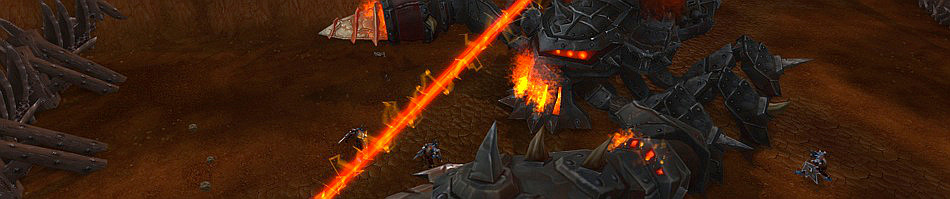
Iron Juggernaut
- Phase 1 – Assault Mode: The boss is tankable.
- Taunt swap after 2 or 3 stacks of Ignite Armor.
- Use active mitigation or cooldowns for Flame Vents/ Ignite Armor. Damage you take will increase with each stack.
- When not tanking, click on the Crawler Mines. You’ll be blasted high into the air and take damage. You should be able to take one without anything special, and a second with some minor cooldown or heal.
- Phase 2 – Siege Mode: The boss is not tankable.
- Both tanks should diffuse Crawler Mines.
- You shouldn’t have to worry about getting targeted by the laser, but you still need to avoid all the ground effects. There’s a lot of AoE damage going around so you’ll have to heal yourself if possible.
- Suggested Brewmaster talents: Xuen, Chi Wave
Kor’kron Dark Shaman
- The first pull requires you pull them outside the building, following pulls they’ll be outside.
- Use a cooldown like Fortifying Brew at the pull. The wolves deal quite a bit of damage, and you won’t need the cooldown again until much later.
- One boss to each tank.
- Tank swap debuff: swap bosses at around 6 stacks of Froststorm Strike.
- While tanking Earthbreaker Haromm:
- After dropping below 50% health, he will periodically cast Ashen Wall. This is a non-killable wall of adds that don’t move but will melee anyone nearby. Tank him near the edge of the area with your back to a wall/structure. He’ll summon the wall in front of him so as long as he’s facing the edge, it shouldn’t cut off huge swaths of the area.
- Tanks don’t really need to know about his other abilities. Just be sure to move him so that the melee don’t get slammed by the Ashen Wall.
- While tanking Wavebinder Kardris
- At 65% health, she’ll start to periodically summon poison elementals on top of her target, Foul Geyser. You have to kite these without letting most of them reach you and without kiting them through the rest of the raid. Always tank her in an area that’s away from other raiders and with a clear kiting path for when she does cast that ability. Use ranged AoE abilities and snares if you have them.
- Tanks don’t really need to know about the other totem abilities. Just stand away from stuff that looks bad.
- Suggested Brewmaster Talents: Xuen (use at the pull to take advantage of his cleave burst), Chi Burst for Foul Geyser adds
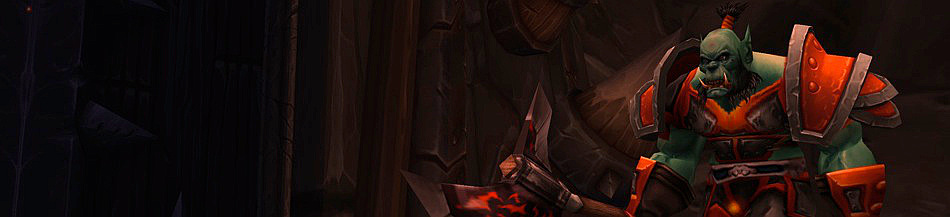
General Nazgrim
- Position the boss near the add spawn point (three doors in the back) to make add pickup easier.
- Tank swap at 3 stacks of Sundering Blow, or as soon as your stacks fall off. He gains more rage the more stacks of Sundering Blow are on his target, which can help him use far more deadly abilities later on, so taunt-swap as soon as you can.
- Adds: He’ll regularly summon adds. The important adds for tanks to pick up are:
- Ironblades: Lowest kill priority, but they must be tanked away from the raid because of their Ironstorm AoE ability.
- Warshaman: Highest kill priority. Must be tanked away from other adds and especially away from the boss, otherwise they’ll be able to heal Nazgrim when they drop Healing Tide Totem. Kill the totems once they spawn, interrupt Empowered Chain Heal.
- Stances
- Defensive Stance: As long as you still have stacks of Sundering Blow, you can dps the boss without fear of giving him extra rage.
- Berserker Stance: You’ll take a bit more damage, so use some defensive cooldowns if you have them. Also use offensive cooldowns since he takes more damage.

Malkorok
- Heals turn into shields like on Heroic Tortos, so keep your health high. Generally, you should use your heals and absorbs whenever your Ancient Barrier debuff is green or red.
- Taunt swap after 12 stacks of Fatal Strike. This debuff gradually increases all damage you take so be prepared to use cooldowns at high stacks.
- Just like the rest of the raid, you’ll have to stand in the purple void zones to prevent them from exploding and you’ll have to avoid the Arcing Smash and Breath of Y’Shaarj.
- Phase 2 – Stack phase
- Can heal normally.
- Whole raid needs to stack in front of the boss for Blood Rage. If you’re feeling crazy, you can try to tank those attacks without splitting with the rest of the raid.
- Recommended Brewmaster Talents: Xuen, Dampen Harm
Spoils of Pandaria
- Crate opening order (there are many ways to do this, but here’s the method that’s worked well for me):
- 4 small crates, all at once.
- Both panda crates, one at a time.
- All medium crates, two at a time.
- Both large crates, one at a time.
- In Mogu Room:
- Anima Golems (medium crates) summon red pools on the ground, move all mobs out of those (as it heals them).
- Mogu (medium crates) drop purple runes on the ground, move all moves out of those (as it increases their damage).
- Minibosses in large crates summon statues that stun in a cone effect. Just stay out of those and cleave off of them if possible.
- In Mantid Room:
- You shouldn’t have to worry about bombs (cast by adds from the big crate), but the rest of the raid will. Watch out for the bombs they drop when opening boxes.
- Panda crates (in both rooms):
- On death, drop a nice debuff for all players of that role in that quadrant. Anyone can pick it up and the buff will apply to the appropriate role.
- Windwalkers: Watch out for their Path of Blossoms, which deals a lot of damage.
- Brewmasters: Raid should watch out for Breath of Fire.
- Mistweavers: Run away from Gusting Crane Kick.
- Recommended Brewmaster Talents: Rushing Jade Wind

Thok the Bloodthirsty
- Phase 1 – Tank Phase
- Fearsome Roar – tank swap, increases all damage taken. Swap at 2 stacks.
- Deafening Screech shouldn’t affect tanks directly, but will interrupt healers. The longer this phase goes on, the more often he casts this. Eventually your healers will only be able to cast instants, so you’ll have to take care of yourself.
- Even though he is a dinosaur, he has the traditional dragon attacks of a frontal breath and a tail swipe. Tank him with the raid at his side.
- Phase 2 – Kite Phase
- He cannot be tanked and will instead focus on a non-tank. He’ll also eat anyone in his way, so don’t stand in front of him.
- Kor’kron Jailer: A single add will spawn at the start of this phase. Pick it up quickly, as it will easily kill non-tanks. He can be disarmed and soothed when he enrages.
- When the Jailer dies, you can “loot” his body for the key. The key is not an item but a debuff that allows you to click to open any one of the three jail cells.
- Phase 1 – Tank Phase after eating the Saurok
- Tank swap debuff changes flavors to become: Acid Breath, which decreases your armor. Swap at 2 stacks.
- Phase 1 – Tank Phase after eating the Jinyu
- Tank swap debuff changes flavors to become: Freezing Breath, which will freeze you solid at 5 stacks. Swap at 3 stacks.
- Phase 1 – Tank Phase after eating the Yaungol
- Tank swap debuff changes flavors to become: Acid Breath, which inflicts a stacking magic DoT. Swap at 2 stacks.
- Recommended Brewmaster Talents: Xuen

Siegecrafter Blackfuse
- The Boss
- Electrostatic Charge – Tank debuff. Be prepared with active mitigation and cooldowns at high stacks of this debuff. This debuff also increases your damage dealt to shredders.
- Protective Frenzy – Doubles his attack speed. Be prepared with active mitigation (especially avoidance).
- Blackfuse hits very hard, so play defensively and watch timers so you can use your cooldowns appropriately.
- Tank swap: Should happen whenever an Automated Shredder is summoned. One tank on the shredder, one tank on the boss.
- Shredders can be damaged by Saw Blades and other environmental damage effects. They turn red when the effect is damaging them.
- Shredder should die by the time next tank debuff goes out. In most cases you should be able to bring it down by yourself.
- Shredder must be tanked far away from the boss to prevent them both from healing. An obvious green beam will link the two mobs if they are too close.
- Death from Above: Run out of the circular effect when the Shredder flies into the air. When it crashes down, that’s your chance to burn it.
- Avoidables (this fight is all about avoidables):
- Sawblades – Don’t stand in them.
- Shockwave Missile – Similar to Engulfing Flames on Ragnaros, the danger area will flash for a few seconds before dealing massive damage, then move on to another area.
- Superheated – Stay out of fire on the ground.
- Magnetic Crush – Pulls you and the sawblades towards an edge. Avoid the sawblades as they rush past.
Paragons of the Klaxxi
- Rik’kal the Dissector (tanked)
- Shouldn’t be tanked by the same person as Skeer
- Injection: It’s really important that you watch the boss timers and use active mitigation when he’s about to use this ability. Shuffle doesn’t count, but Elusive Brew and Guard do, as well as other tank’s more obvious forms of AM. If this reaches 10 stacks, it’s pretty much a raid wipe.
- Skeer the Bloodseeker (tanked)
- Shouldn’t be tanked by the same person as Rik’kal
- Summons giant blood adds, help to snare, stun, and kill them before they reach other bosses and heal them.
- Hisek the Swarmkeeper (not tanked)
- Split damage of Aim by standing in the line
- Korven the Prime (tanked)
- Help kill Amber when he casts it.
- Shield Bash: Stuns his target, followed by major damage. You should use cooldowns or particularly strong and reliable (i.e. not avoidance) active mitigation before or during the initial cast. The other tank can also taunt him off you, or you can get a life grip.
- Xaril the Poisoned Mind (tanked)
- Shouldn’t be tanked by the same person as Kil’ruk.
- Caustic Blood: It’s really important that you watch the boss timers and use active mitigation when he’s about to use this ability. Shuffle doesn’t count, but Elusive Brew and Guard do, as well as other tank’s more obvious forms of AM. If this reaches 10 stacks, it’s pretty much a raid wipe.
- Places random color debuffs on players:
- Red – stay away from others
- Blue – stack up with 1 other person
- Yellow – drop a void zone at your location
- Kaz’tik the Manipulator (not tanked)
- Summons Kunchong adds that will need to be tanked if they reach 100 energy, cleave
- Iyyokuk the Lucid
- Separate if you have Fiery Edge
- Will kill you if you drop below 25% health. He doesn’t hit hard so there’s not much danger of this happening.
- Ka’roz the Locust (tanked)
- Runs around a lot, but not much else to worry about other than holding aggro.
- Kil’ruk the Wind-Reaver
- Shouldn’t be tanked by the same person as Xaril.
- Gouge: Stuns his target and follows it with a big attack. Be prepared with some cooldowns.
- Recommended Brewmaster Talents: Xuen, Chi Wave, Dampen Harm
Garrosh
- Garrosh hits incredibly hard (~500k melee swings in 10man normal), so play defensively. The tanking legendaries will really help you out here.
- Phase 1: Add phase
- One tank on boss, other should pick up adds.
- Warbringers snare.
- Wolfriders heal. Only interrupt the Chain Heal, not the Lightning Bolt.
- Iron Stars: Try to stun adds in the path of the Iron Star right as it starts rolling.
- Transition Phase: Sprint and try to pick up all the adds quickly. Assign a tank to left and a tank to right so that each of you knows which side/path to take (as there are multiple layouts).
- Phase 2: Special abilities
- Gripping Despair: Tank debuff. Swap after 3 stacks. If Gripping Despair becomes empowered, upon expiring it will leave another debuff that permanently increases the damage of Gripping Despair. This is a soft enrage.
- Whirling Corruption: If you’re tanking the boss while he casts this, pull him as far away from the raid as possible so as to prevent their taking extra damage. If Whirling Corruption becomes empowered, it will also summon sha adds. These adds either need to be kited (and left alone by dps) or burned down separately to prevent their healing each other.
- Phase 3: All Special abilities are empowered
- Same as phase 2, but everything is empowered.