This is a difficult fight for tanks and healers, and an extremely boring fight for damage dealers. Each phase gets progressively more intense until you finally reach the chaotic finish. It’s widely believed to be the most difficult fight in Dragon Soul because it requires highly focused dps, a lot of blood control, and lucky strings of avoidance while kiting. After all the nerfs it has received, I’d rank the 10 man version far below Heroic Madness and Heroic Warmaster, but it is still a difficult fight.
As with most my guides, this is intended for tanks because that’s the role I filled. I hope there are helpful things for other roles, but I am not an expert in those roles. I expect you to know the basic mechanics of the fight before diving into this guide. There are many solutions to complex boss fights like these, and the way we did it is not the only right way.

Differences between Normal and Heroic
- There are two new debuffs to contend with: Blood Corruption: Death and Blood Corruption: Earth. They are cast by the Amalgamations, so during a barrel roll the debuffs will appear more often.
- Blood Corruption: Earth is the “good” debuff and will apply Blood of Neltharion to its target after it has run its course. Blood of Neltharion reduces damage taken by 10%, stacking three times (though if you have a healing priest or resto shaman in your raid, it will only stack twice due to Inspiration and Ancestral Healing). Healers should try to get this debuff on the tanks quickly by dispelling it whenever it is not on a tank.
- Blood Corruption: Death is the “bad” debuff. It will wipe the raid if it has run its course, and it needs to be dispelled quickly.
- Degradation. For every amalgamation that explodes, the raid’s maximum health is lowered by 6%. It makes healing very spiky near the end, especially on the blood tank.
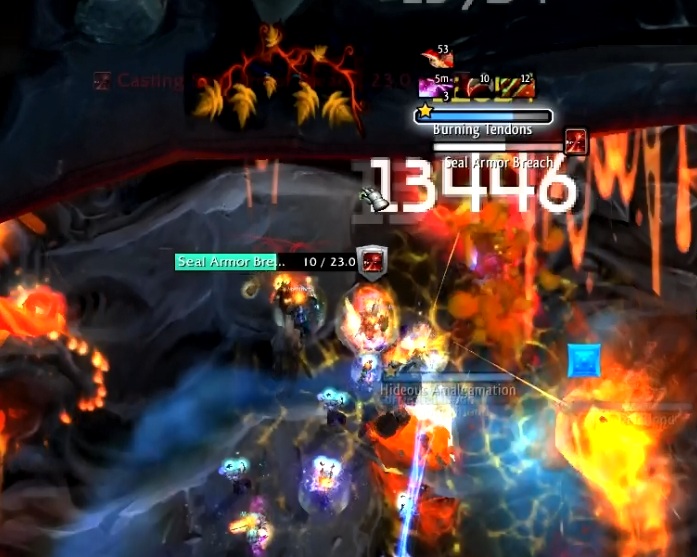
- The Burning Tendons have much more health and it will take an ideal raid two Amalgamation explosions to destroy a single tendon.
- There’s a lot of blood. If you don’t have a stellar computer then you should probably turn nameplates off during the third phase because you could pretty easily lag out.
Raid Stacking
This fight is infamous for raid stacking. After being nerfed to the ground, you should not have to make good players sit for bursty classes. However, it doesn’t hurt to increase your burst damage wherever you can. Having a hybrid feral tank was very important to our strategy, as well as an atonement priest and some extra dps from other healers during the tendon phase.
Some classes with a high ramp-up time or those that heavily rely on long duration dots are not optimal, but as long as your damage dealers use their cooldowns properly, adjust to a high-burst rotation, and gear for burst, they should do alright.
Preparation
- We used 2 tanks, 3 healers, and 5 dps for this fight. A mixture of ranged and melee is optimal.
- Every dps class (and even some healers and tanks) should buy their respective Valor Point trinket. They all have on-use cooldowns that will be available for every single tendon exposure. Even if the trinket is horrible for your long term dps, no one really cares about your long term dps here. Here’s a list of the trinkets for reference:
- Kiroptyric Sigil (agility)
- Bottled Wishes or Reflection of the Light (spell power)
- Rotting Skull (strength)
- Dps should repec and reforge for burst, if it’s appropriate for your class.
- You need at least one healer specced to dispel.
- You might find it useful to make Corrupted Blood health bars a bit transparent if you’re using a nameplate mod. I found it helpful so that I could spot the amalg faster.
- Whichever tanks you have, be sure to use them in the roles that suit their strengths. Warriors are great at kiting the bloods, paladins are great at AoEing bloods, bears are great as amalg tanks because that leaves them available to dps in cat form during tendon phases, and DKs are good anywhere (I think).
- All of the tank-threatening damage is physical. Keep that in mind while preparing your spec and gear.
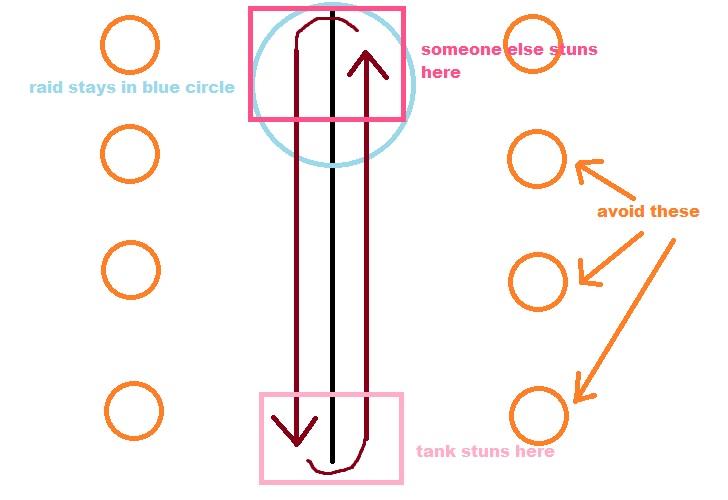
- AoE stuns are very useful for kiting during the last phase. We used to paladins with Glyph of Holy Wrath, though there are many other ways to protect your blood tank while he’s kiting.
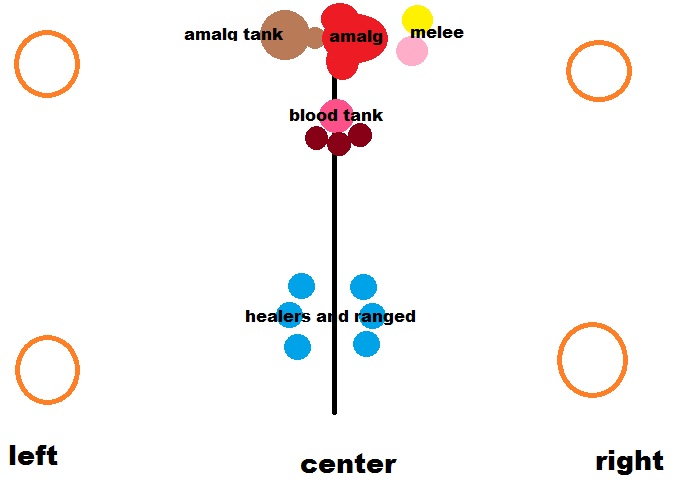
Phase 1
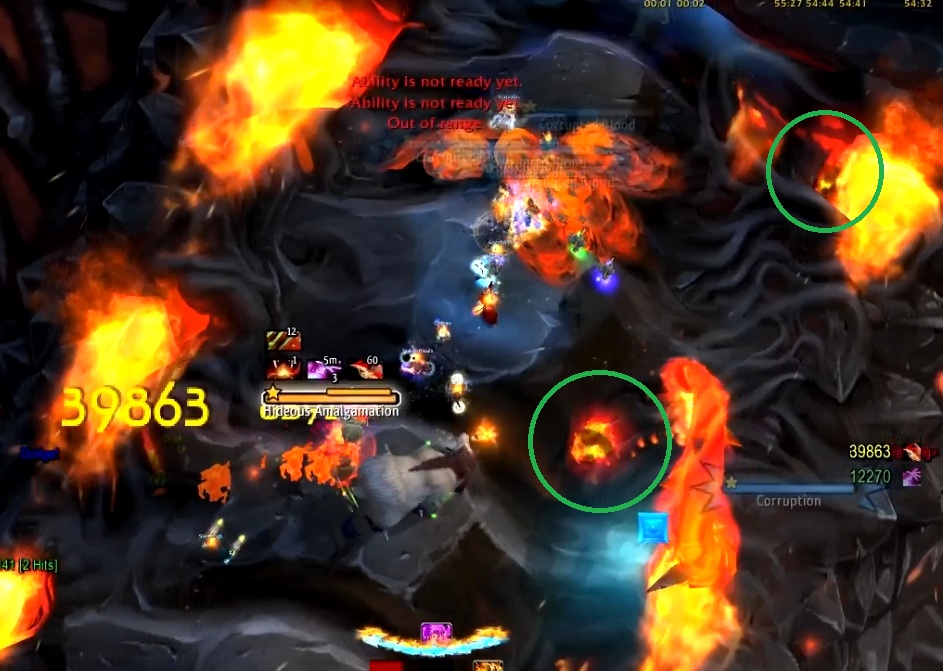
This is what we refer to the phase before we destroy the first tendon. Start by killing all the Corruptions and then standing on one side to force a Barrel Roll. Your raid should stand where the last Corruption died, so that you don’t accidentally get the new Corruption spawn while rolling. Tanks should be picking up bloods and amalgs to keep them off healers.
After the amalgs float away, one tank (as well as the damage dealers) should run over to the newly spawned Corruption and be prepared to pick up the new Amalg once it spawns. Try not to let the amalg pick up blood pools unless they are close to the holes where they disappear and spawn more blood. The other tank should pick up bloods and pull them to the middle.
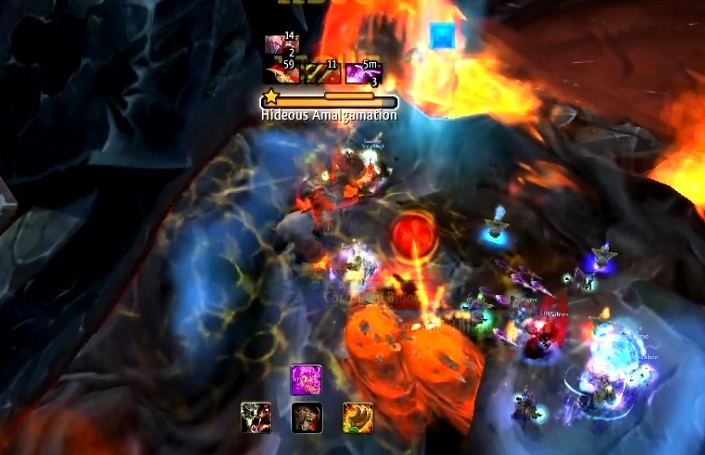
We positioned the amalg directly over the spine so that the tank and the melee would balance out Deathwing. The bloods were tanked in a spot that was far enough from the amalg that it did not get stacks, but near enough that the melee and tanks could AoE them.
Keep the bloods and amalg in their positions until the amalg is low (around 12%), then drag it around to soak up blood pools. During the first go, you might have trouble finding enough blood so your dps needs to be able to stop on command should you have to wait for another blood to spawn and die. Though the amalg does hardly any damage without blood stacks, it can be quite dangerous at 7 or 8 or 9 stacks. Its tank should use a strong cooldown to help the healers while you wait for more blood to spawn and while it explodes. I’ve found that sprints like Stampeding Roar are very useful for picking up blood pools quickly.
Once there are 9 stacks of blood on the amalg, the tank should drag it to one side of Deathwing’s back plate (I always took it to the right side). It must always explode on the same side so that the same tendon is exposed. Run away once it’s starts exploding and prepare for the exposed tendon.

We timed our Corruption dps such that it died right when the tendon spawned, which will spawn another amalg (this is to prevent the corruption stun during the burn). If your amalg tank is dpsing the tendon, the blood tank will need to temporarily pick it up and keep it away from blood pools. The blood tank should try to dps the tendon, but their priority is keeping new adds off the healers. The tendon phase lasts for less than 23 seconds, and afterwards the amalg tank needs to taunt to amalg back into position.
Repeat once more and the first tendon should be dead and you’re on to phase 2.
Phase 2
Bloods are far more numerous in this phase, but still not enough to require kiting. Besides the increased blood count, Phase 2 is almost exactly the same as phase 1. Dps should cleave and AoE the bloods to keep them from overwhelming the tank. Remember that bloods do around 10k damage to the raid when they burst, so AoE has to be controlled.
Once the tendon dies, the new Corruptions need to be killed, new amalgs and bloods need to be picked up, and the raid needs to roll Deathwing. During this transition, the tanks should try to use the new amalgs to soak up remaining blood pools. Soon these amalgs will fall off Deathwing’s back, and the blood they picked up will not find its way to a hole and respawn. This helps keep the sheer number of Corrupted Blood low. Be extremely careful not to get 8 or 9 stacks; you can’t have the amalg explode while Deathwing is rolling.
Just like the first phase, the amalg tank needs to run to the newest Corruption and pick up the amalg as it spawns. This time, be extremely careful not to pick up any unnecessary blood pools. If your amalg has only a few or no stacks, you should try to clean up any blood that is about to respawn. Any more than 5 and it’s not worth it, however. Sometimes blood pools look like they only contain one or two bloods, but they actually contain 4 or 5, and you do not want a 9-stacked amalg at this point in the phase.
Be very careful positioning the amalg; backpedal if you need to avoid any pools of unknown size. Position the amalg and bloods similar to phase 1, but move it up to the new back plate. Everyone should still be relatively close together (if you have a shaman, they should all be within Healing Rain range). AoE carefully, and repeat just like phase 1.
The blood tank should try to stagger the death locations of the bloods so that they don’t all enter a hole and respawn at once. You want a staggered respawn rate.
While picking up blood pools, the amalg tank should try to soak up pools that are close the the holes because they will respawn the soonest.
Everything else is the same as phase 1. When the barrel roll transition happens, remember to pick up spare pools with the many amalgamations available. However, it is very easy to accidentally soak up 9 pools during this time so be careful!
Phase 3
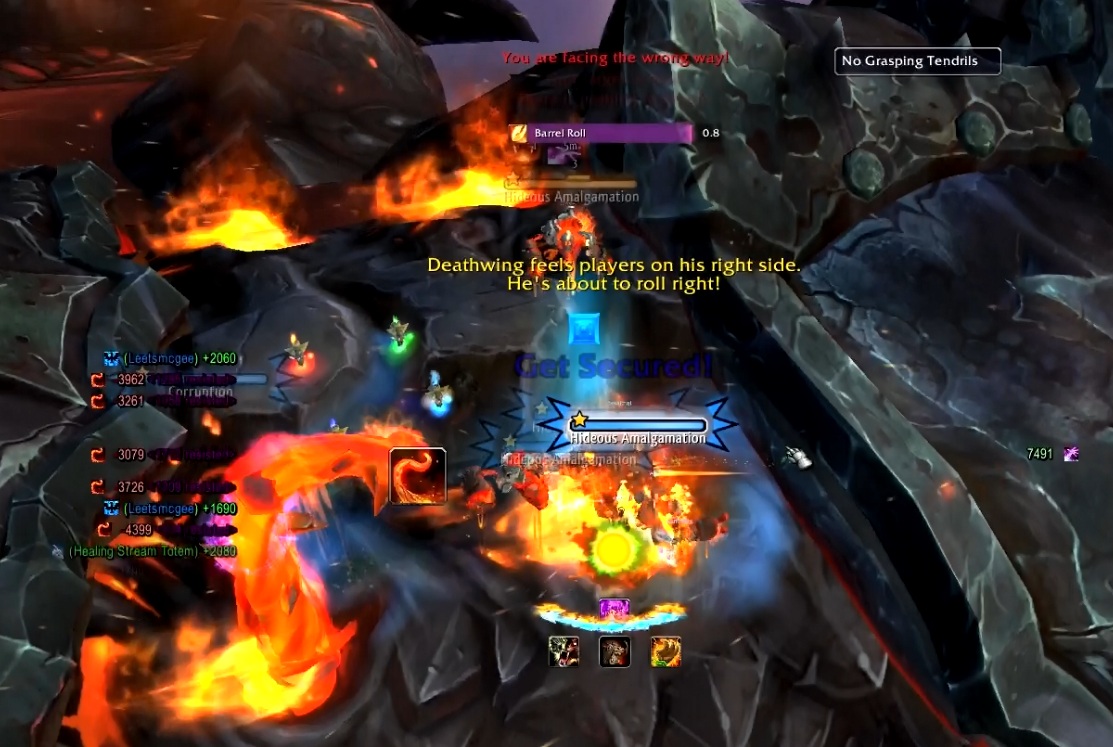
The blood tank will have to start kiting in this phase. It’s best to wait until there are around 9 blood pools before kiting. Once kiting, remember to strafe and never show the mob of bloods your back. Don’t run too close to the holes in Deathwing’s back or else you’ll get snared. If there’s a Corruption filling up a hole, you can walk close to it without worrying about the snare. Use an AoE stun or cooldown at each turn around point.
The amalg tank will need to tank the amalg all the time because the other tank needs to kite, so if they’re feral they can’t dps tendons in cat form any more. They should still dps the tendon while in bear form if possible. The amalg tank is also responsible for picking up stray bloods because the other tank is busy kiting. No one should be dpsing the blood unless you need more to soak later, so don’t try to kill them. Just keep them off the healers. Try not to AoE while the blood tank is in your area because you do not want to accidentally pull any of those bloods away.
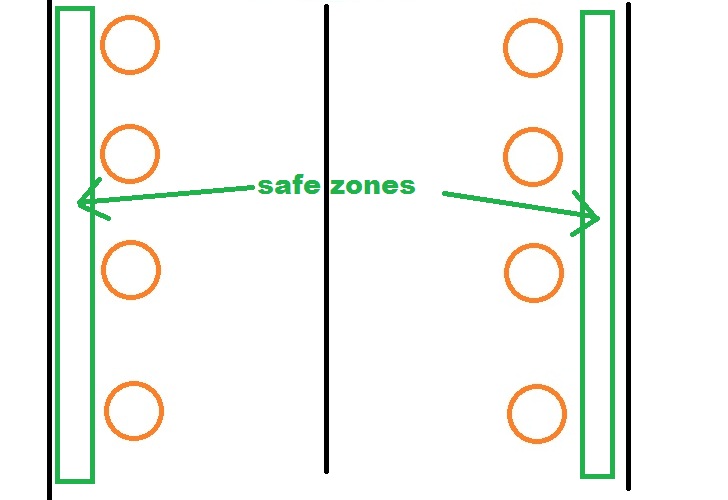
During the tendon phase, the amalg tank needs to pick up the freshly spawned amalg and rush over to dps the tendon without picking up any blood pools. It’s more important to deliver the amalg safely than to dps during this phase, so DO NOT RUSH IT. Seriously, backpedel all the way to the tendon if you have to and use the safe route on Deathwing’s sides. We use Heroism during the first tendon exposure on the third phase, so your dps should be able to handle it on their own.
This time around, while the blood tank is still kiting, the amalg tank will need to pick up extra bloods and at least 9 will need to be killed. As long as the amalg is high on top of the spine and pushed near the wall, it shouldn’t pick up the new blood pools (at least not all of them) until you move it.
Burn the amalg down, pick up blood pools (there will be much fewer and far more spread out than previously), and position the amalg for the explosion. There won’t be a new amalg spawn this time around, but the amalg tank will still have bloods on them and will take damage, though they should be dpsing the tendon just like everyone else, while AoEing to keep respawning bloods off healers. The blood tank should continue kiting and praying.
And that should pretty much be the end of it.