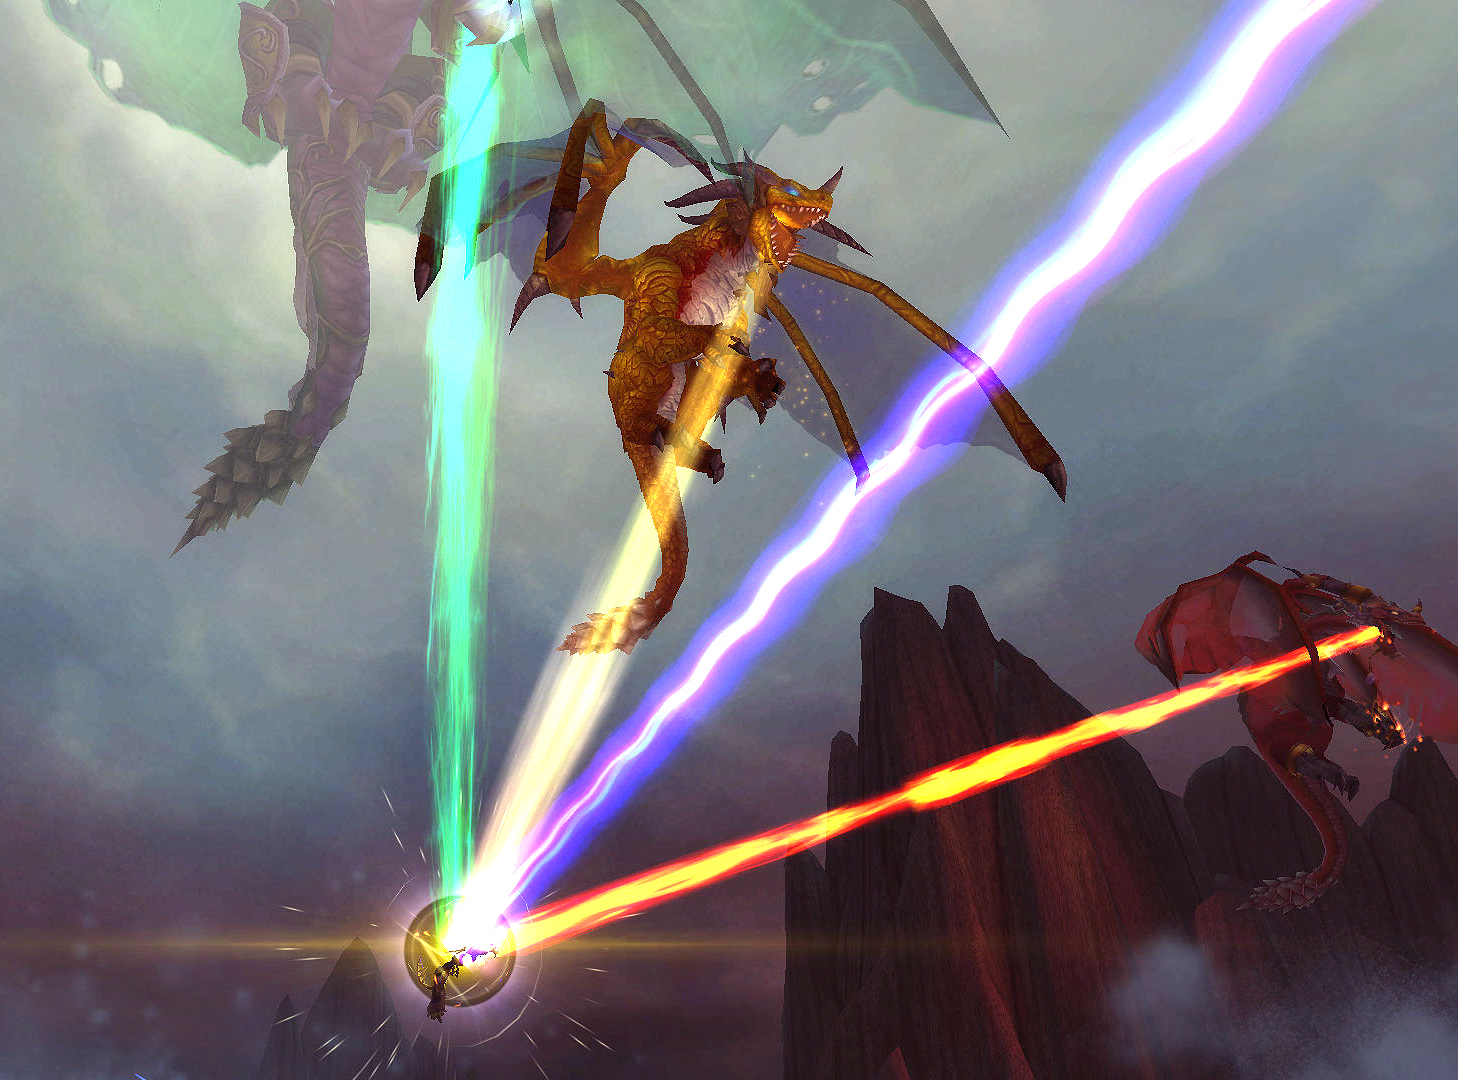
In 10 man, Heroic Madness is more difficult than Heroic Spine, and will probably remain difficult even after successive nerfs. Don’t get fooled into thinking that you’ll be done with this tier after just one or two nights of wiping, because it will probably take many more. Heroic Madness is very stressful for healers, but pretty straightforward for tanks and dps.
As with most my guides, this is intended for tanks because that’s the role I filled. I hope there are helpful things for other roles, but I am not an expert in those roles. I expect you to know the basic mechanics of the fight before diving into this guide. There are many solutions to complex boss fights like these, and the way we did it is not the only right way.

Differences between Normal and Heroic
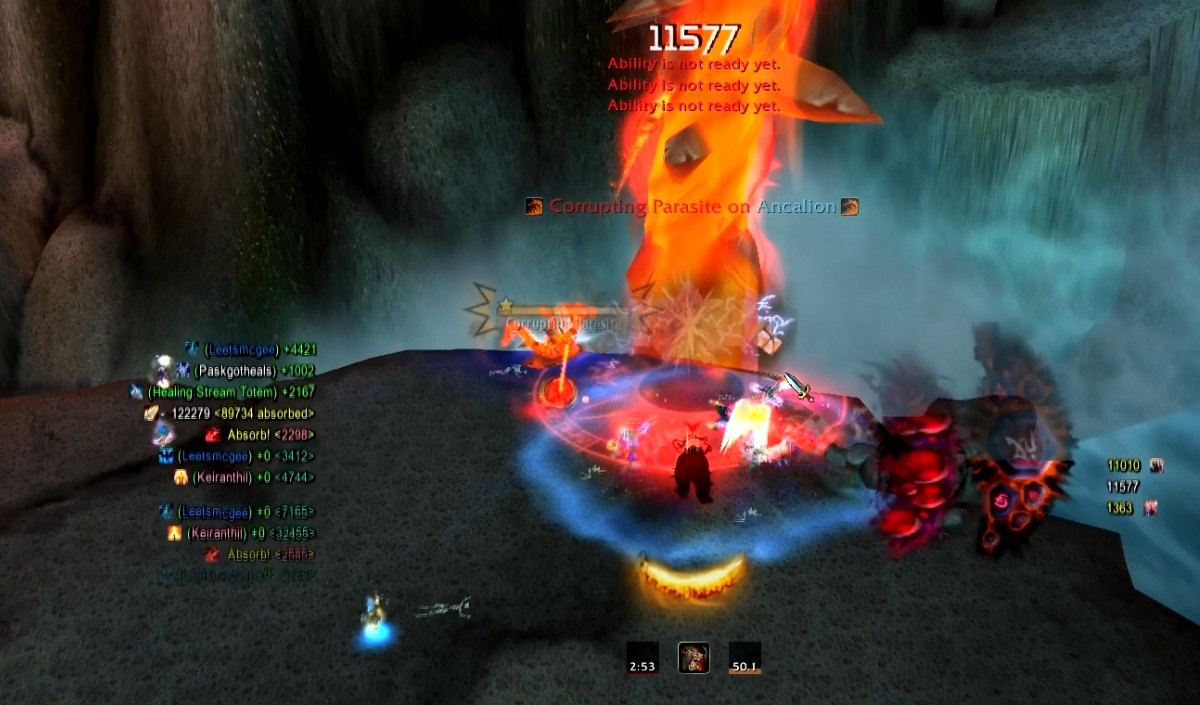
- Corrupting Parasite – A new debuff that deals increasing shadow damage to its randomly selected target. After 10 seconds, the debuff will fall off and a new mob spawns. Ten seconds after that (or 15 seconds, if the parasite landed inside the yellow time bubble), the parasite will explode, dealing damage equal to 10% of its remaining health to the entire raid. It should be killed or left close to death when it spawns.
- Unlike in normal mode, you will not have enough dps to kill a Mutated Corruption before the second
Impale. You will need two tanks (or a shadow priest + DK tank) to soak them all. Impales also hit much, much harder. Remember that they cannot be mitigated by armor or block, but they are mitigated by pretty much everything else. (I’ll talk more about them later.) - Hemorrhage happens just like in normal mode, but you will likely still be attacking the Mutated Corruption while it spawns. They always spawn around the second Impale. (This isn’t really a difference between normal and heroic, but it caught me off guard so I’m warning you all the same.)
- In phase 2, Congealing Blood (looks just like Hemorrhage) will spawn on the platform edge opposite of Deathwing’s head, and then race toward him. Each blood that reaches him will heal him for 1% of his health.
- The standard order for platforms in Heroic is Green -> Red -> Bronze -> Blue.
Preparation
- We used one full-time tank and one feral with a hybrid spec, three healers, and the rest were a mixture of melee and ranged dps.
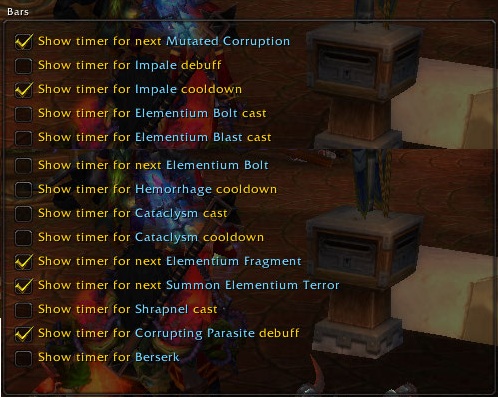
- Shave down your boss mod timers. There’s a ton of timers for this fight and it’s very easy to get overwhelmed by them, which is unnecessary because most roles don’t need the majority of them.
- For
Congealing Blood in Phase 2, you will need some sort of AoE snare, like Chilblains or Fan of Knives. - As a feral druid hybrid, I used this spec/glyphs. I also regemmed, reforged, and re-enchanted everything to optimize kitty dps, and equipped standard dps trinkets.
- There are many opportunities for Power Auras (also debuffs to put on Grid) here. First is for Corrupting Parasite, which puts an icon and a timer for when the debuff will fall off and deal AoE damage.
Version:4.23; icon:ability_rhyolith_magmaflow_wave; buffname:Corrupting Parasite; x:-100; bufftype:2; owntex:true; size:0.44; y:-23; timer.enabled:true; timer.x:-107
- Next is Shrapnel, which you won’t see until Phase 2. You have to use Dream to survive Shrapnel, but the Shrapnel cast is longer than 5 seconds so you have to watch the debuff closely to survive.
Version:4.23; icon:ability_deathwing_shrapnel; buffname:Shrapnel; x:260; bufftype:2; owntex:true; size:0.34; y:-38; timer.enabled:true; timer.y:-7; timer.x:250
- Last is Tetanus, which only tanks (and possibly healers through grid) will need to track. It’s the debuff applied by Elementium Terrors.
Version:4.23; icon:ability_tetanus; buffname:Tetanus; x:201; bufftype:2; owntex:true; size:0.21; y:-49; stacks.enabled:true; stacks.y:-33; stacks.x:216
First Platform (Green)
You start out with a few seconds of dps on Deathwing’s Arm Tentacle. Soon a Mutated Corruption will spawn; try to save dps cooldowns for that. This goes for all platforms, because a third Impale almost always means a wipe and you want to avoid that. I know it’s tempting to use all your cooldowns during Cataclysm, but you should be able to beat Cataclysm without cooldowns, whereas killing the Mutated Corruption before the third Impale can be difficult.
The first tank should be at the back ready to pick up the Mutated Corruption well ahead of time. Everyone needs to be spread out radially so that Crush hits no more than one person. If you’re in melee range, you can actually be standing right next to each other without multiple people getting hit.
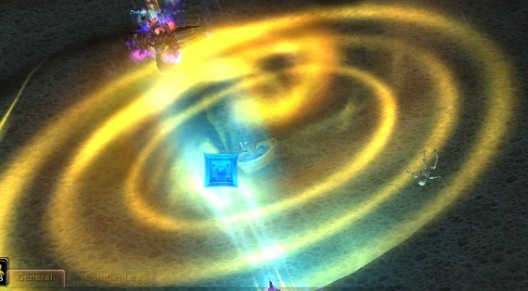
Tanks cannot be Corrupting Parasite targets unless you’re in cat form. If you do get Corrupting Parasite, immediately run to the yellow time bubble (Time Zone) and make sure no one is standing within 10 yards of you. The yellow time bubble will reduce the time it takes for the Parasite to explode once it falls off of its host. Sometimes the Time Zone will not be available yet (this often happens on the first platform), but you should still bring it to the correct area to avoid confusion. You can bubble or Cloak of Shadows the debuff off early, though be sure the rest of your raid is warned you’re doing so. For the first three platforms, we only assign 2 ranged damage dealers to wear the first Parasite down.
Here are the cooldowns we used for Impale on the first platform. When using Dream, remember that it only has a 5 second duration, so you should not use it too early. You also must taunt before the actual Impale cast; once the cast starts the Corruption will Impale its current target and nothing will change that (unless the current target runs out of range, but that’s not part of this strategy).
- Tank 1: Hand of Sacrifice + Dream + 20% reduction cooldown
- Tank 2 (who only tanks for the Impale): Hand of Sacrifice +
Dream +
20% reduction cooldown
During the second Impale,
Hemorrhage adds will spawn, which we had the second tank pick up (the Corruption needs to be taunted by Tank 1 after the Impale). They don’t do much melee damage, so it’s okay if they attack a healer for a few seconds. The real dangerous damage they do comes from the stacking debuff, Degenerative Bite. While it’s true that tanking them in the Time Zone reduced their damage output, we decided to tank them where Tank 2 normally stands and leave the Time Zone available for the parasite target (that is, until it’s time to move them).
Dps should ignore the Hemorrhage adds until the Corruption is dead and the Corrupting Parasite has spawned. Then the tank should quickly drag the blood over the Parasite and everyone should AoE. Use Dream liberally while tanking these things. If possible, tank them between the Parasite and Deathwing’s tentacle, so that Spellweaving has a chance to chain off of everything.

Don’t forget that damage dealers need to take down the Elementium Bolt before it hits the ground.
Second Platform (Red)
This platform is much the same as the last, except the healers do less healing and you no longer have access to Dream. Tanks are limited by their personal 3 minute cooldowns, which means that if you clear this platform in less than 3 minutes, you will have to be creative with cooldown usage. Otherwise, the tanks won’t survive the Impales on the third platform. Tanks will also need to use their big cooldowns 5-6 seconds before the actual Impale cast so that they will be available as soon as possible later.
Here is how we managed cooldowns.
- Tank 1:
Hand of Sacrifice +
20% reduction cooldown + 50% reduction cooldown (use 5-6 seconds before cast) - Tank 2:
Hand of Sacrifice +
20% reduction cooldown + Frenzied Regeneration + Spirit Link Totem + Divine Guardian + Shields from priests of all flavors and holy paladins (you can also use Pain Suppression if it’s available)
After this platform, the Impale order will be switched. Tank 2 will tank the first, Tank 1 will tank the second.
Third Platform (Bronze)
Now that you’re on the bronze platform, you no longer have Alextraza’s help killing Blistering Tentacles, and you’ll have to do it yourself. This slows down dps, but you should still be able to beat the Cataclysm timer. Once the Blistering Tentacles do spawn, they need to be killed quickly before the damage they deal becomes unhealable. They must be single-targeted down.
The tanks have now swapped positions. Tank 2 should be ready to pick up the Corruption once it spawns, and they should tank it until after the first Impale, then go back to dpsing. Tank 2 should still pick up Regenerative Blood once they spawn. With the Blistering Tentacles, hopefully your dps will slow down enough that your 3 minute cooldowns will have time to come up before the next platform.
- Tank 2:
Tank 2 (who still only tanks for the Impale): Hand of Sacrifice + 20% reduction cooldown + 50% reduction cooldown
(use 5-6 seconds before cast) - Tank 1: Hand of Sacrifice + 20% reduction cooldown + 50% reduction cooldown (use 5-6 seconds before cast)
Fourth Platform (Blue)
The big difference on this platform is that you won’t be able to kill the Elementium Bolt before it crashes. If you have a damage reduction cooldown or an immunity, you should use it (except for tanks). If you don’t have either of those or if it’s just a weak cooldown, stay far away from the impact site. Raid cooldowns like Divine Guardian should be used at this point. Then it needs to be burned down quickly.
The Corruption always spawns on the same side of this platform (the right side, if you’re facing Deathwing). Tanks should use the same cooldowns as last time.
- Tank 2 (who still only tanks for the Impale): Hand of Sacrifice + 20% reduction cooldown + 50% reduction cooldown
- Tank 1: Hand of Sacrifice + 20% reduction cooldown + 50% reduction cooldown
Dps is very tight on this platform, and because you don’t have Time Zone anymore you have to find another place for the Parasite. We always try to drop them next to the Corruption so that everyone can easily cleave and get more Spellweaving procs. We also have all dps kill them on this platform.
If you have enough dps, you’ll down the corruption and parasite in time, then move on to Deathwing’s tentacle. It will probably be a close call on the Cataclysm, but if you make it you’re on to phase 2.
Phase 2
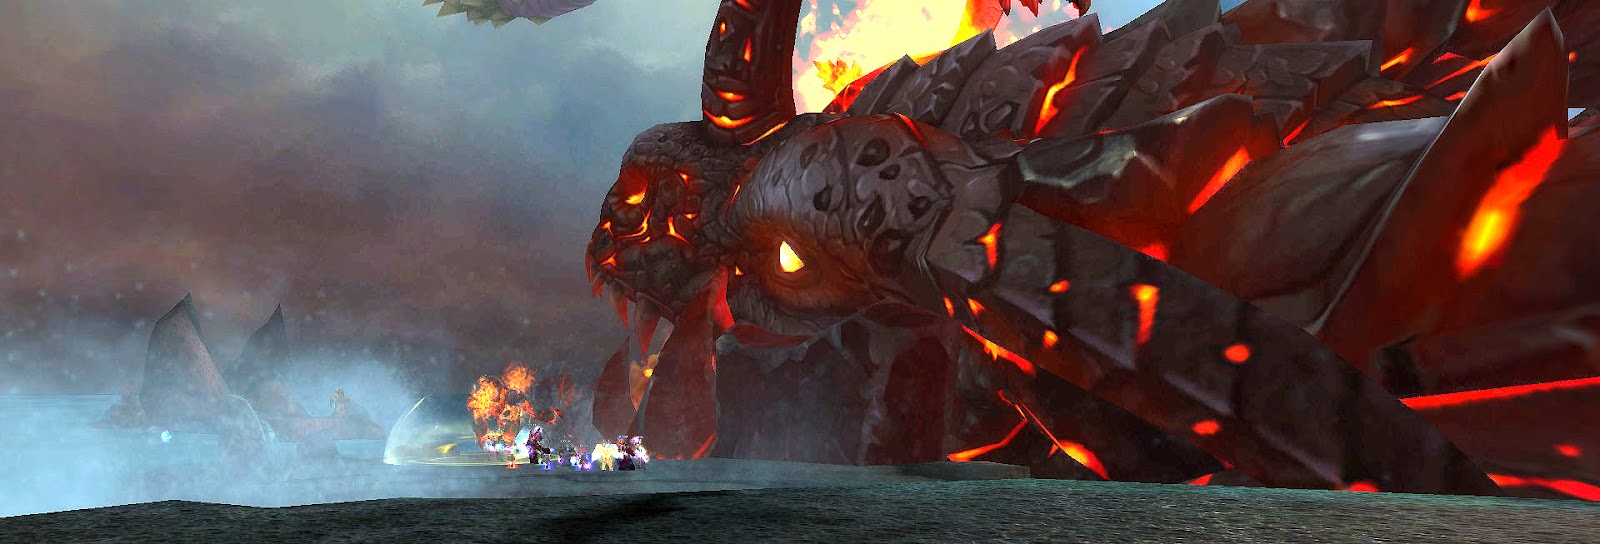
There are many successful ways to get through this phase, but all of them require exact timing, high dps coupled with tight dps control, and intense healing.
The primary thing tanks have to worry about is picking up Elementium Terrors. They apply a dangerous stacking debuff, Tetanus. You should tank the Terrors inside the Time Zone (they attack slower and have fewer chances to apply Tetanus), and use cooldowns (remember, you have Dream back!) whenever you have three or more stacks.
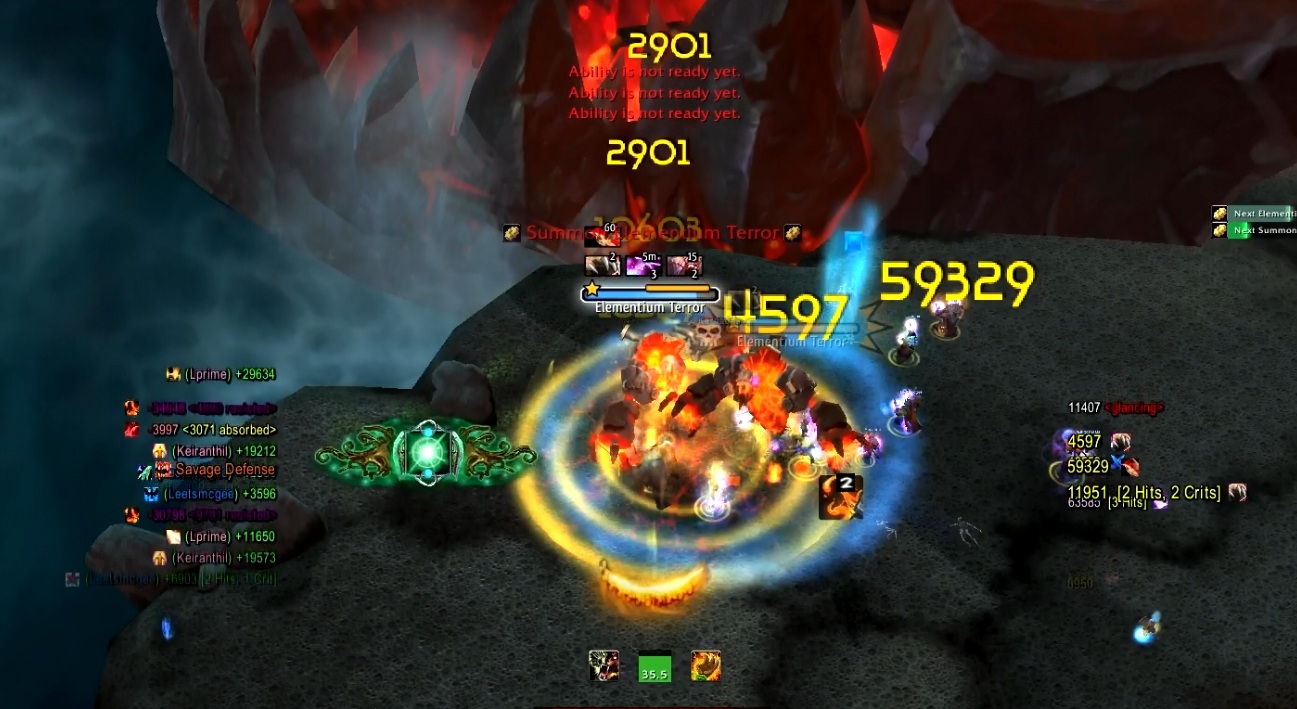
However, before the Terrors even spawn, you have to deal with Elementium Fragments. They should be swapped to as soon as they appear. If you are the target of Shrapnel, you’ll need to use a big cooldown to survive (preferably Dream). Hand of Protection will protect its target from Shrapnel damage, too, so if you have a lot of paladins you should set up a rotation of sorts. The Fragments need to die before they have a chance to cast a second set of Shrapnel.
Back to the Terrors, we have our dps burn them down quickly before the tanks and healers become overwhelmed by their damage. Many guilds do something different — they wait on the terrors and AoE them down once the Congealing Blood spawns. You can reasonably do whichever fits your guild best.
We mark one Terror with a skull and that one is supposed to die first. If, as a tank, your add is the first to die, you can taunt the other add when your Tetanus stacks have fallen off to keep the second tank’s stacks from getting too high. The debuff itself has a short, 6 second duration, but it ticks for huge amounts of shadow damage (not physical like the dungeon journal says). Death Knights can remove stacks with Anti-Magic Shell, and Paladins can bubble the debuff off.
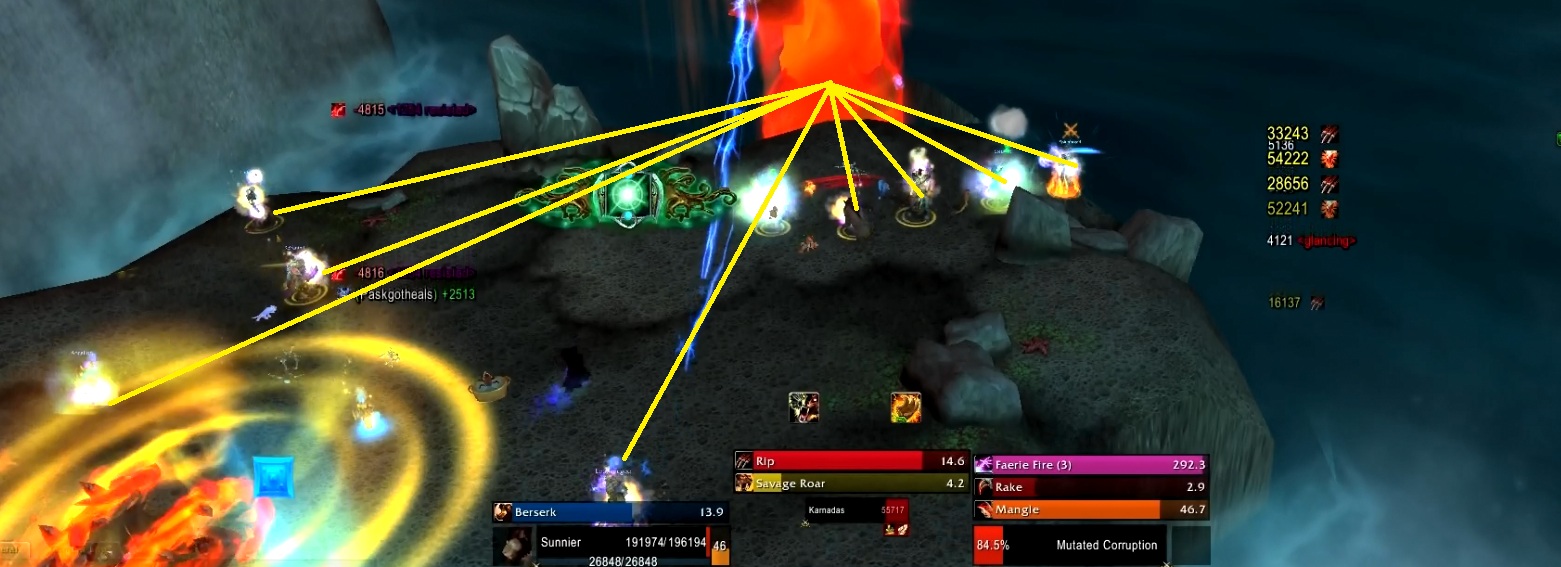
At 15%, 10%, and 5% Deathwing will spawn Congealing Blood. There’s also increased damage that accompanies them, so use Dream if its available. They need to be AoE’d down really, really quickly, as well as snared. They will spawn in one of three locations at the opposite side of the platform; watch out for where they spawn so you’ll quickly be able to reach them.

You will probably need to control your dps to avoid a Congealing Blood at the same time as
Elementium Fragment spawn. Unless you’re really lucky and they all spawn in the same place (and thus can be AoE’d down), you’ll have problems with multiple Shrapnel casts.
You should get two spawns of Fragments, two spawns of Terrors, and three spawns of Blood before Deathwing dies. You might get a third Fragment spawn, but at that point you’ll be close to the enrage timer and they should be ignored.
Deathwing actually dies somewhere around 1.5%, so once you get the Congealing Blood at 5% it’s time to ignore everything else (unless Terrors spawn, they still need to be tanked).
Final Notes
- This is a long fight (around 15 minutes), so everyone should use their various cooldowns often.
- The raid-wide health increase from glyphed Frenzied Regeneration is actually useful in this fight, though I primarily used it as a personal cooldown.
- You can use Heroism/Bloodlust twice. We used it once on the first platform and again on during Phase 2.
Good luck! If you have any questions, comments, or concerns, feel free to ask!