This is the most traditional end game of GW2, and how to actually start it can be unintuitive for players new to the game. It’s very epic and takes some time commitment (it took me three hours, though it could go much longer, and I assume much shorter if you’re lucky).
As a warning, this post may contain spoilers. I’m avoiding any major story points and sticking to strategy, but if you want to be completely surprised then avoid the body of this post. All you really need to know is that you have to unlock the dungeon Arah by completing the Cursed Shore meta event.
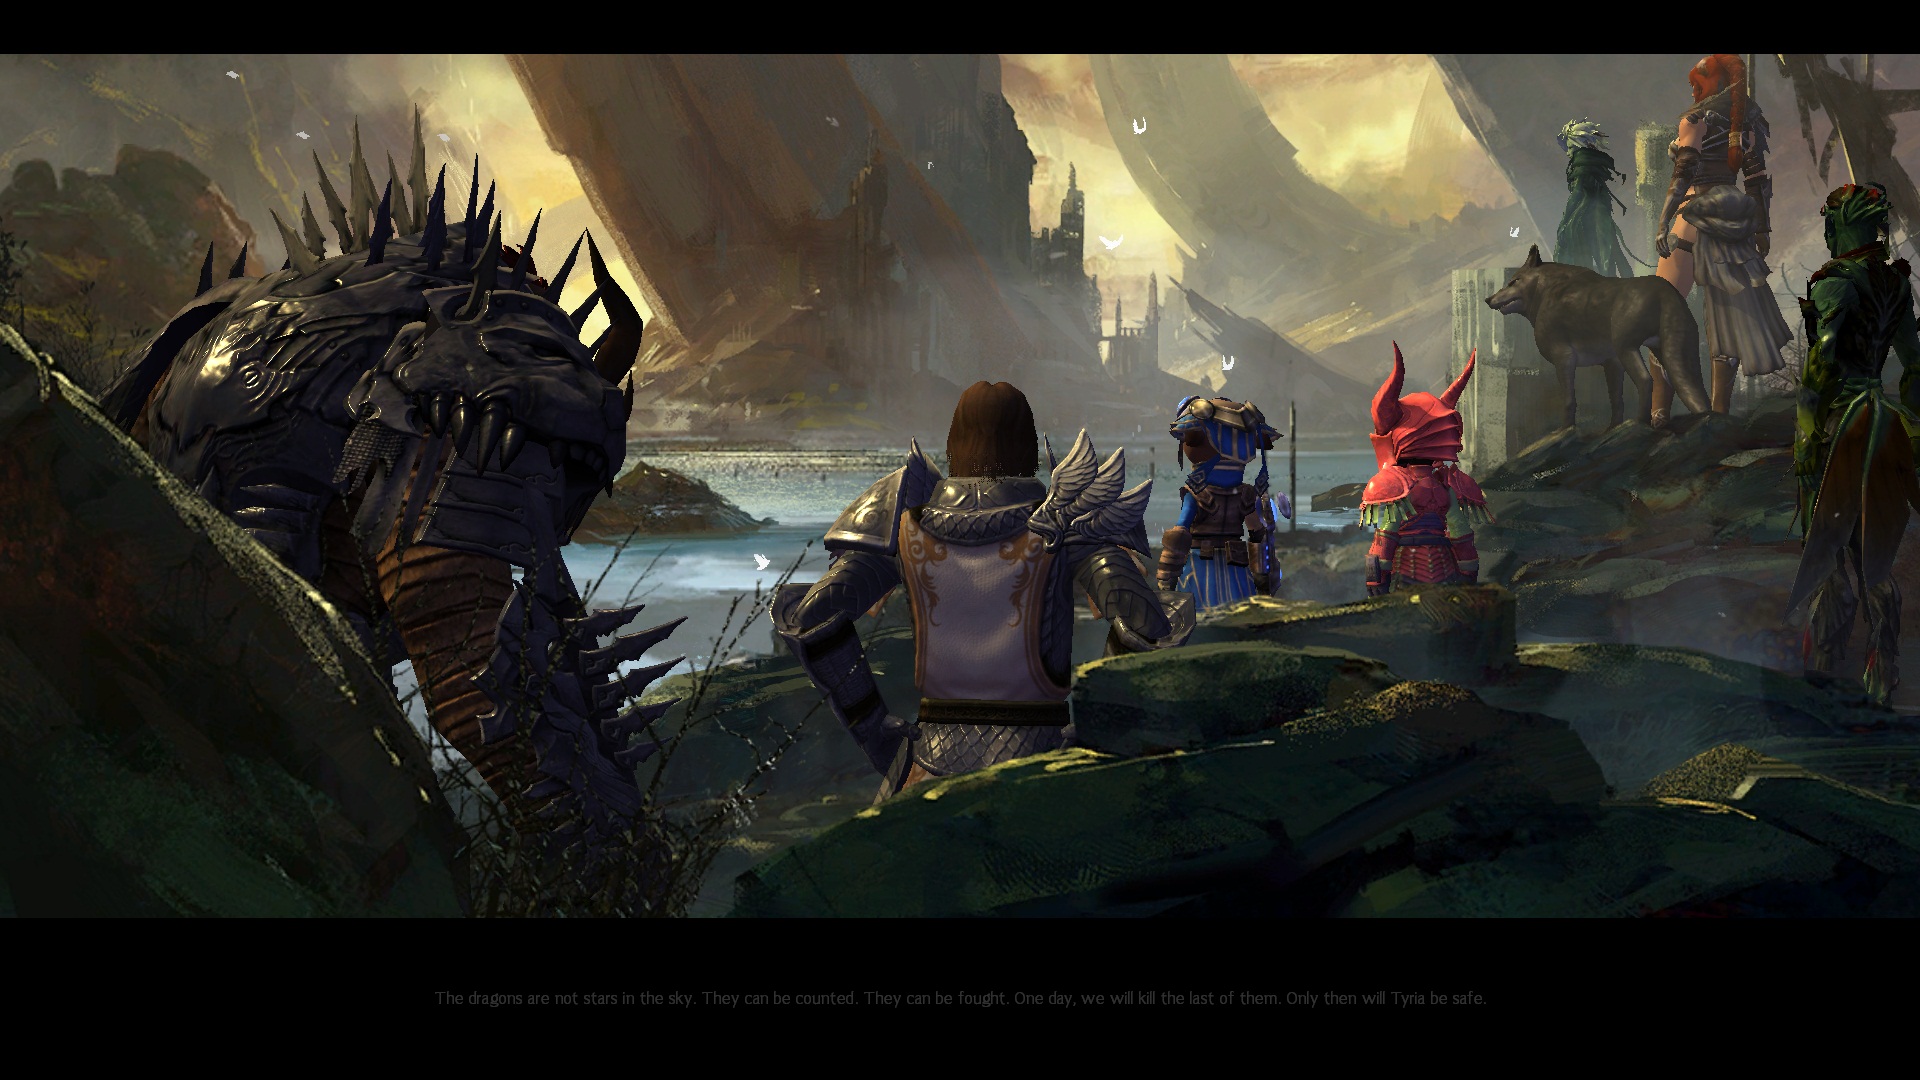
The step of your personal quest you should be on is “Victory or Death”. (I really hate that they chose a cliche name for that quest because it makes it that much harder to Google.) You can still do everything without being on this quest, but killing Zhaitan will also complete this quest for you and you might as well do both at the same time.
Zhaitan is in the dungeon Arah. This is a 5 player dungeon for level 80 players and you will need a group to complete it. It is located in the southwest area of the Cursed Shore. However, unlike the other dungeons, it is blocked by giant gates that can only be opened through world events.
You will need dozens people to complete these world events, though they’re not particularly difficult and require only a small amount of coordination that any pug should be capable of following. Since this is Guild Wars 2, you don’t need a party or raid to work together on events.
Clearing a Path
To start out, you need to travel to the Cursed Shore. This zone is, of course, located on the island of Orr. It’s a level 80 zone, and while you can be less than 80 to enter the zone, you need to be 80 to finish the entire quest line. Once there, you have to find the current meta event. I believe it starts at the northern-most way point, eventually pushing your way south unlocking more way points. Read the text under the meta event to approximate where the attack is currently.
(Note: The early stages of the event will tell you to go to Caer Brier, which I couldn’t find anywhere in this map. I’m 90% sure that’s a bug and they mean to say Caer Shadowfain, the northernmost waypoint.)

Preparing for the Assault
Once you find the current main event, you will travel south with a team of NPCs and a handful of players, gradually grabbing the attention of more players in the area until your group is quite large (we probably had 20 to 30 people with us by the end). Your final waypoint will be Anchorage Waypoint, which is where you stage the upcoming assault.
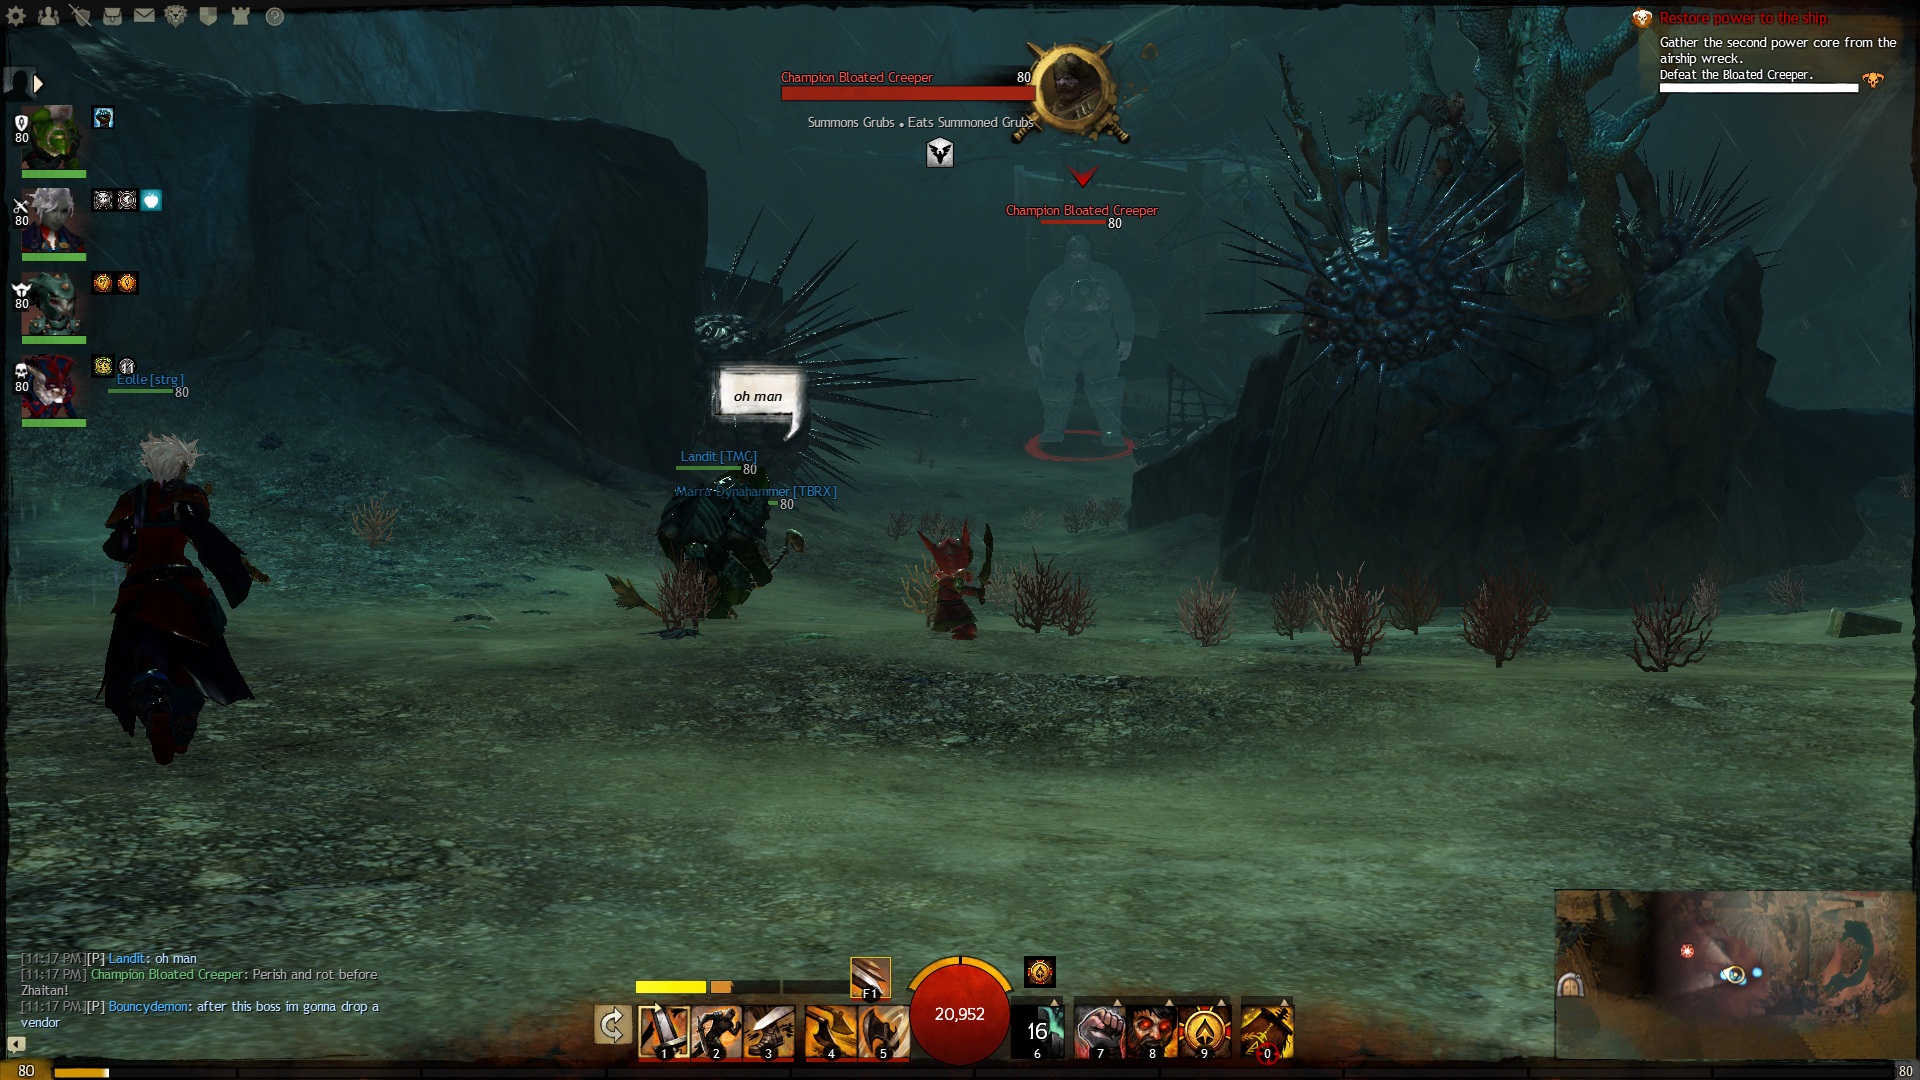
Once Anchorage waypoint is freed, three events will spawn, each one granting you an extra advantage once you head east to Arah, be it either cannons (not 100% sure on that one), a super powered golem, and npc backup. The group should try to split up and have three to five people at each event to ensure completion. Once Anchorage is secure, you will have around 10 minutes to complete all these events before the final assault begins. Any events not completed before the timer will fail.
One will require you to gather scrap metal to build machines. I think this event is slightly bugged because sometimes the scrap metal on the ground is an item that goes straight into your inventory (good), and sometimes it’s an item you can carry around (bad, the NPC doesn’t accept those). Rest assured that you will eventually find enough scrap metal. This is the easiest of the events.
Next is an asura who needs to summon her golem. I’d consider this the most important event, because that golem is a beast and can tank the upcoming bosses. You have to protect and escort her. If the crashed airship event is going on at the same time, sometimes mobs will get stuck inside the airship and you have to go around.
Third is another escort to summon additional reinforcements. It starts a little bit after the others, and while we were never able to successfully complete this event I think it should be pretty easy as long as you have more than one or two people working on it.
Breaking Down the Gates
Once the timer is up, the Pact NPCs will immediately begin assaulting the first steps to Arah. Head west from the Anchorage waypoint to catch up with them.
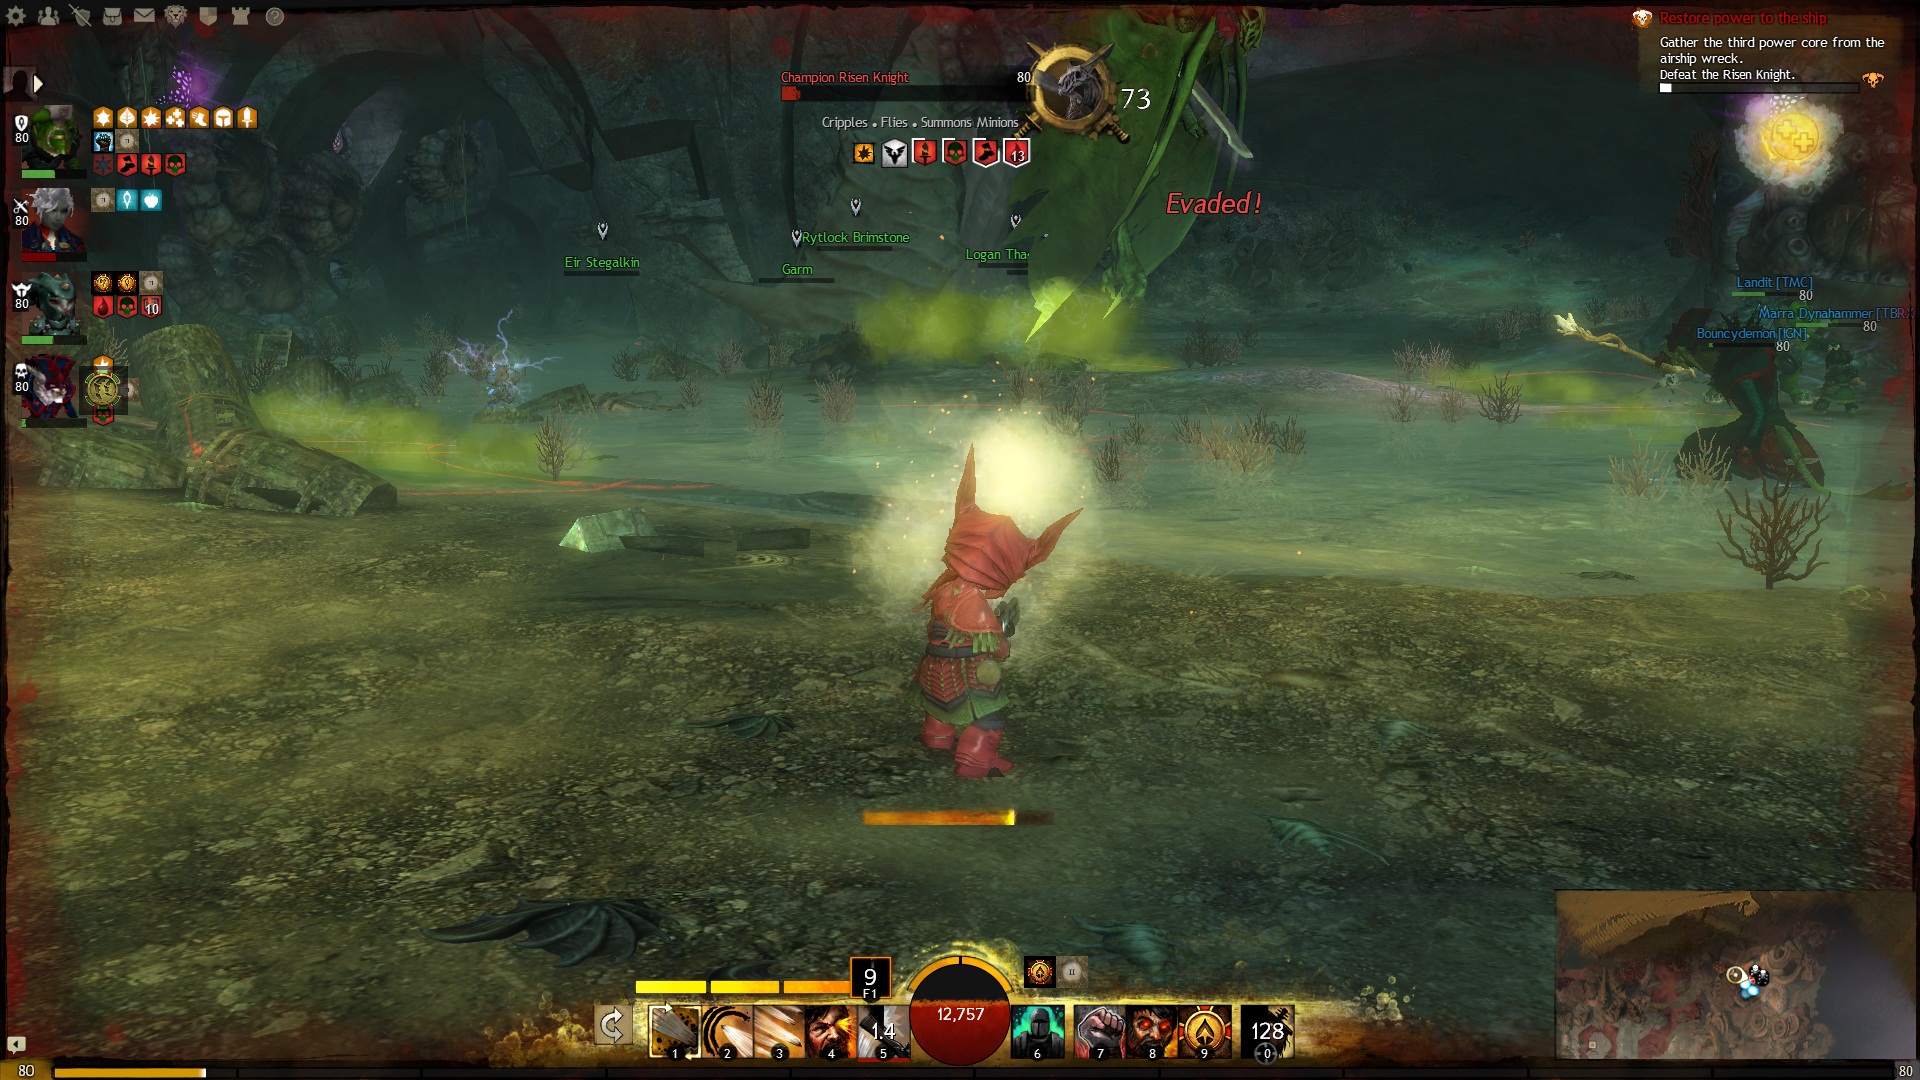
There are three stages to the assault. The first stage has two catapults, a champion giant, and a mob of enemy risen. I recommend killing the catapults early because they can be really annoying. They die quickly. The champion giant is easy; he does the standard giant stomp, so if you’re melee be sure to dodge that. It deals a lot of damage, but in most cases won’t one shot you. If you want to play it safe, just deal damage from range. Once the giant is dead, move up the stairs to the next objective.
This objective is the most difficult of the three. You have a swarm of undead and a champion Eye of Zhaitan. However, to beat this step you have to gain control of the area, which means you hold that spot for a long time. The Eye will very quickly kill you if you’re in melee range, so be extremely careful if you insist on dealing damage up close (you’ll probably die anyways, which will attract people trying to res you, who will probably die themselves). Once the Eye and his minions are dead, everyone should spread out around the perimeter of the blue square that indicates control. If there are no risen inside the blue square, you gain control. Just one risen, and the bar stops progressing. They are easy to kill, but spawn in random places, so it is easiest to spread out and only deal with enemies that spawn close to you. If you are able to keep the area clear for long enough to fill the bar, you can progress to the final stage.
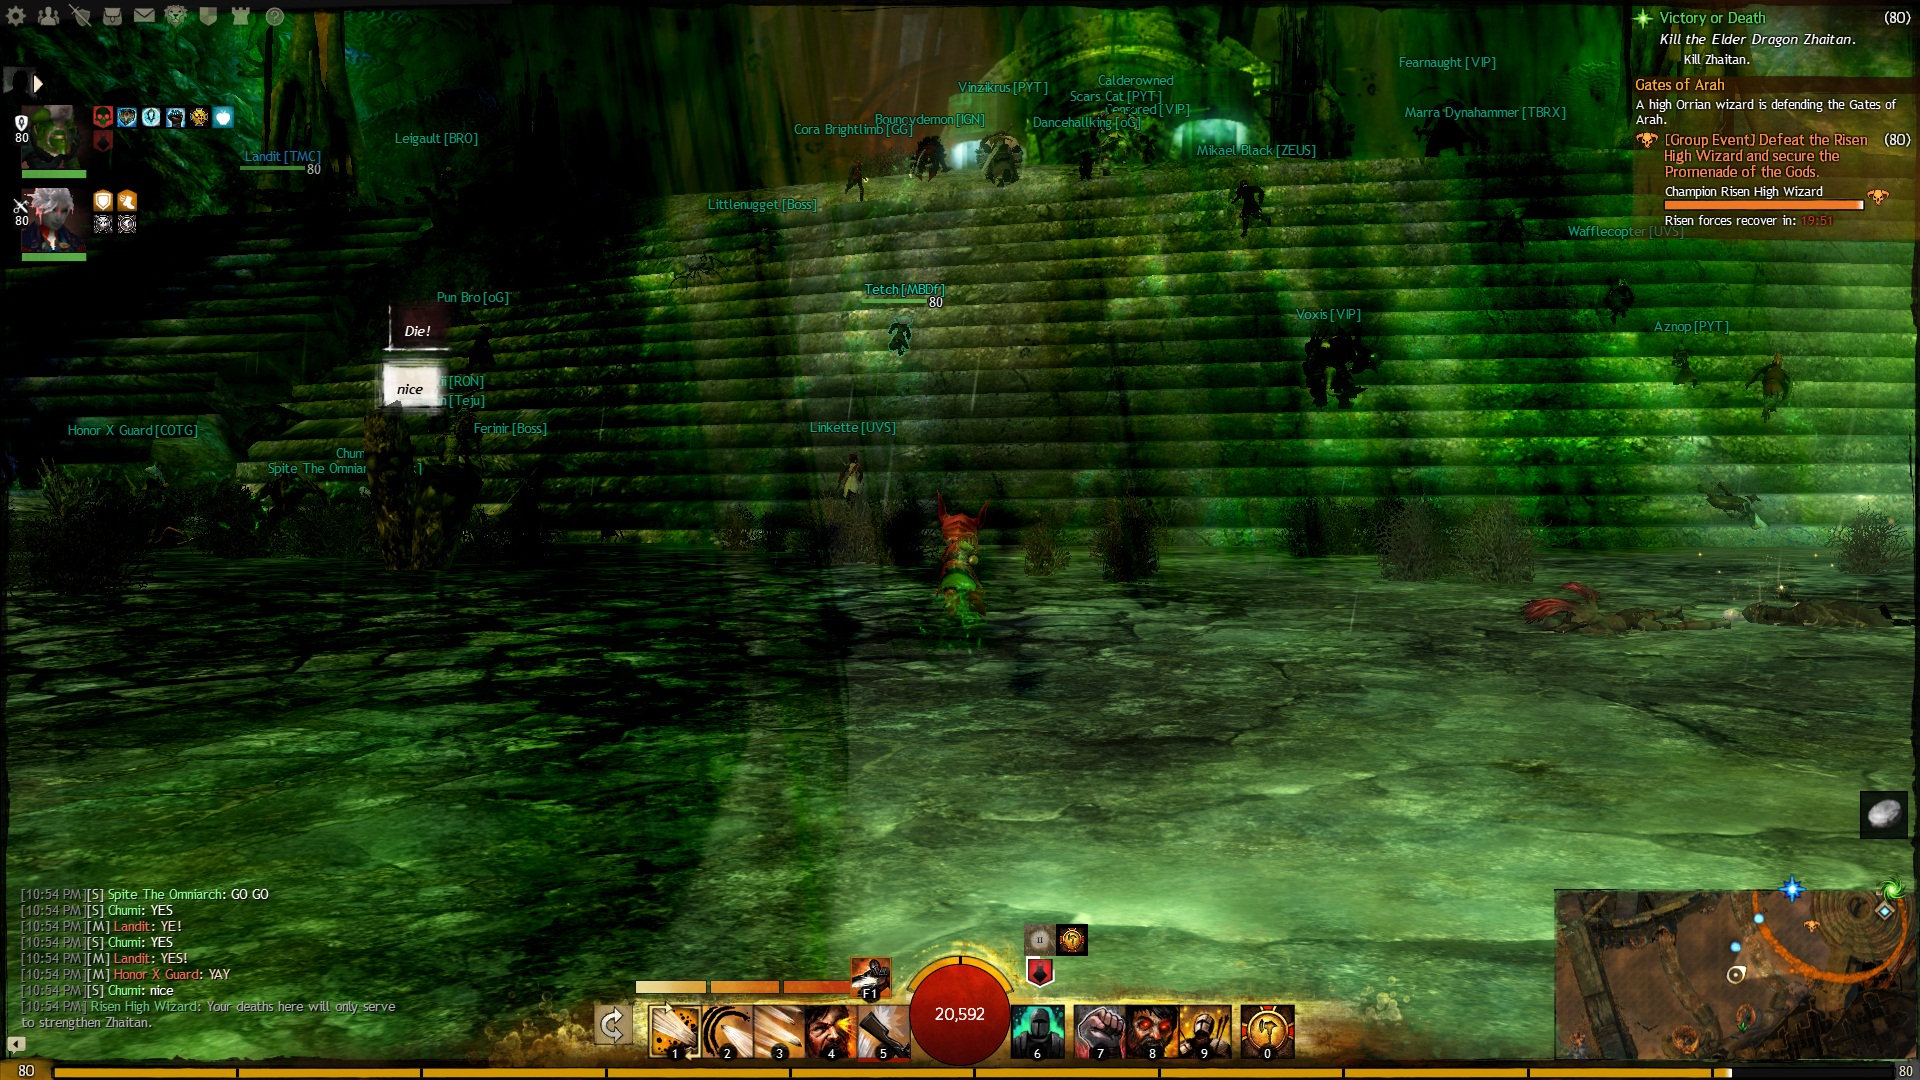
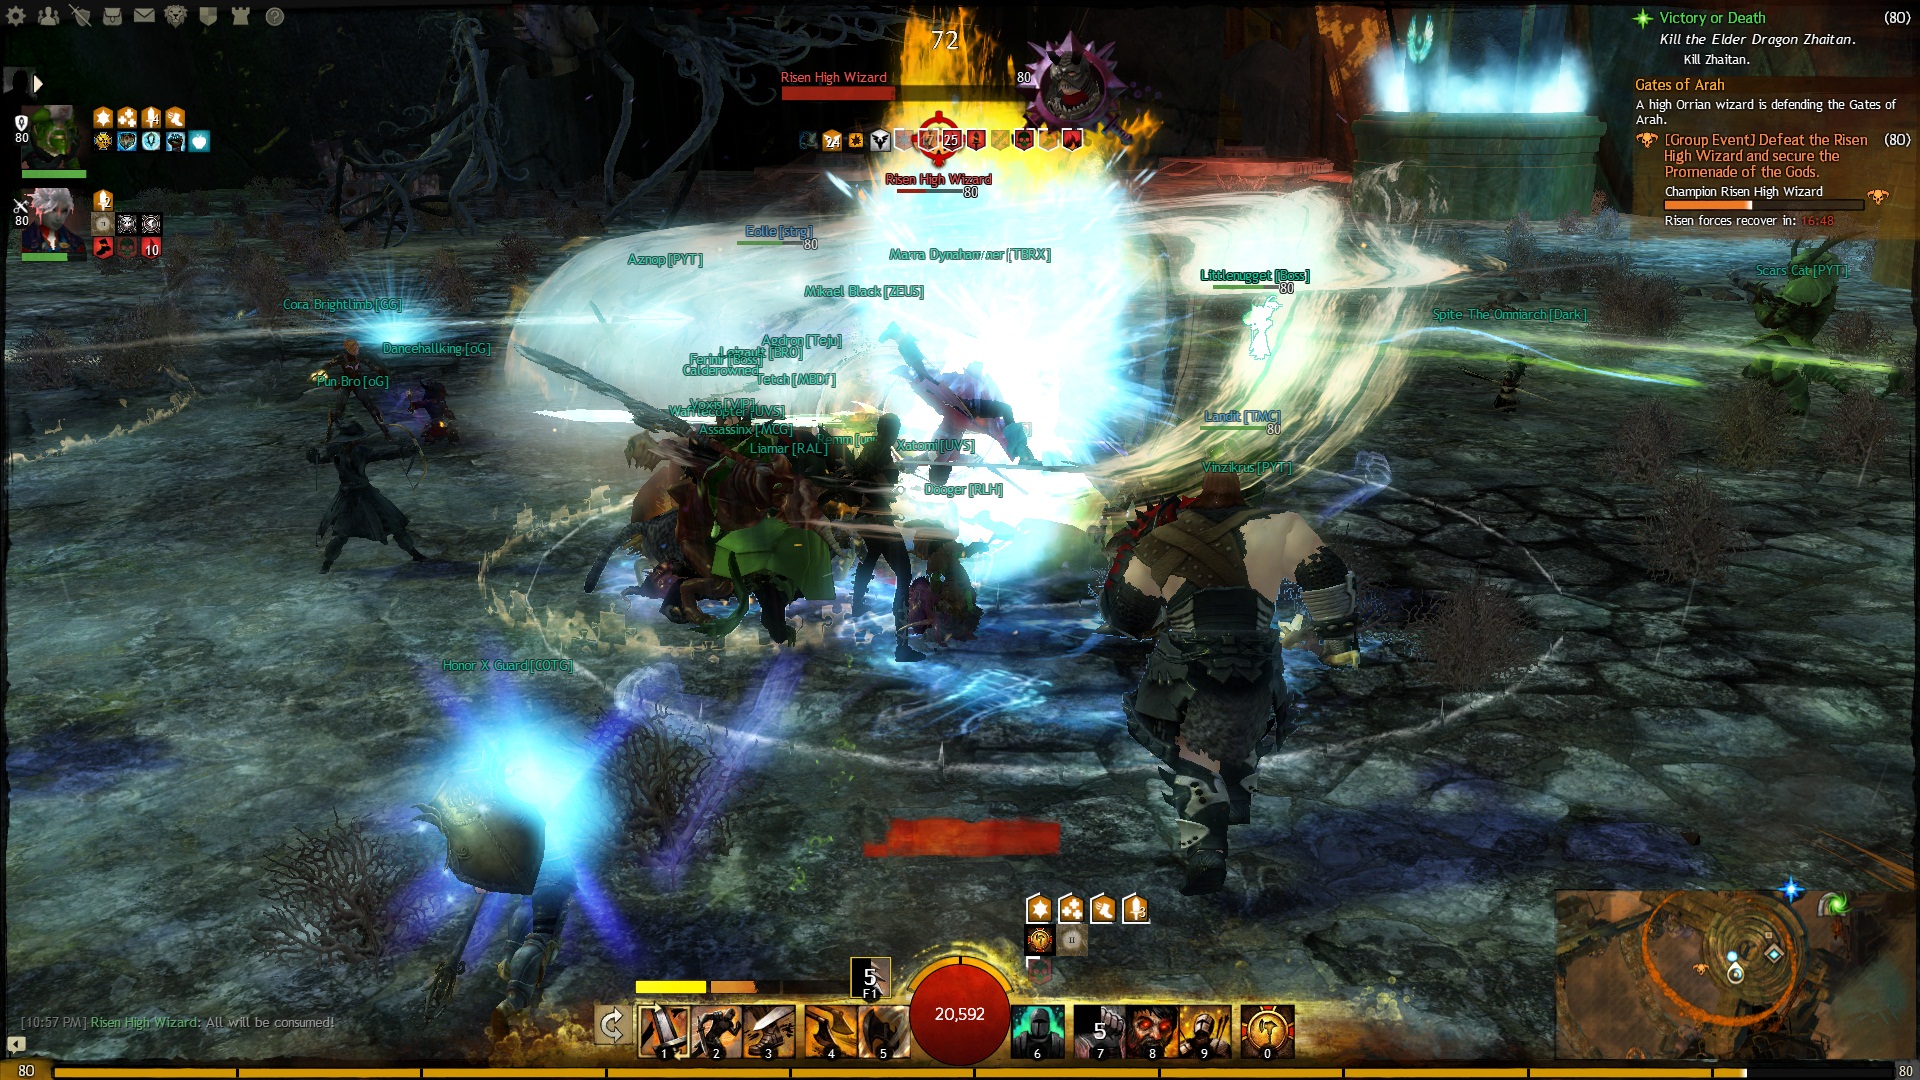
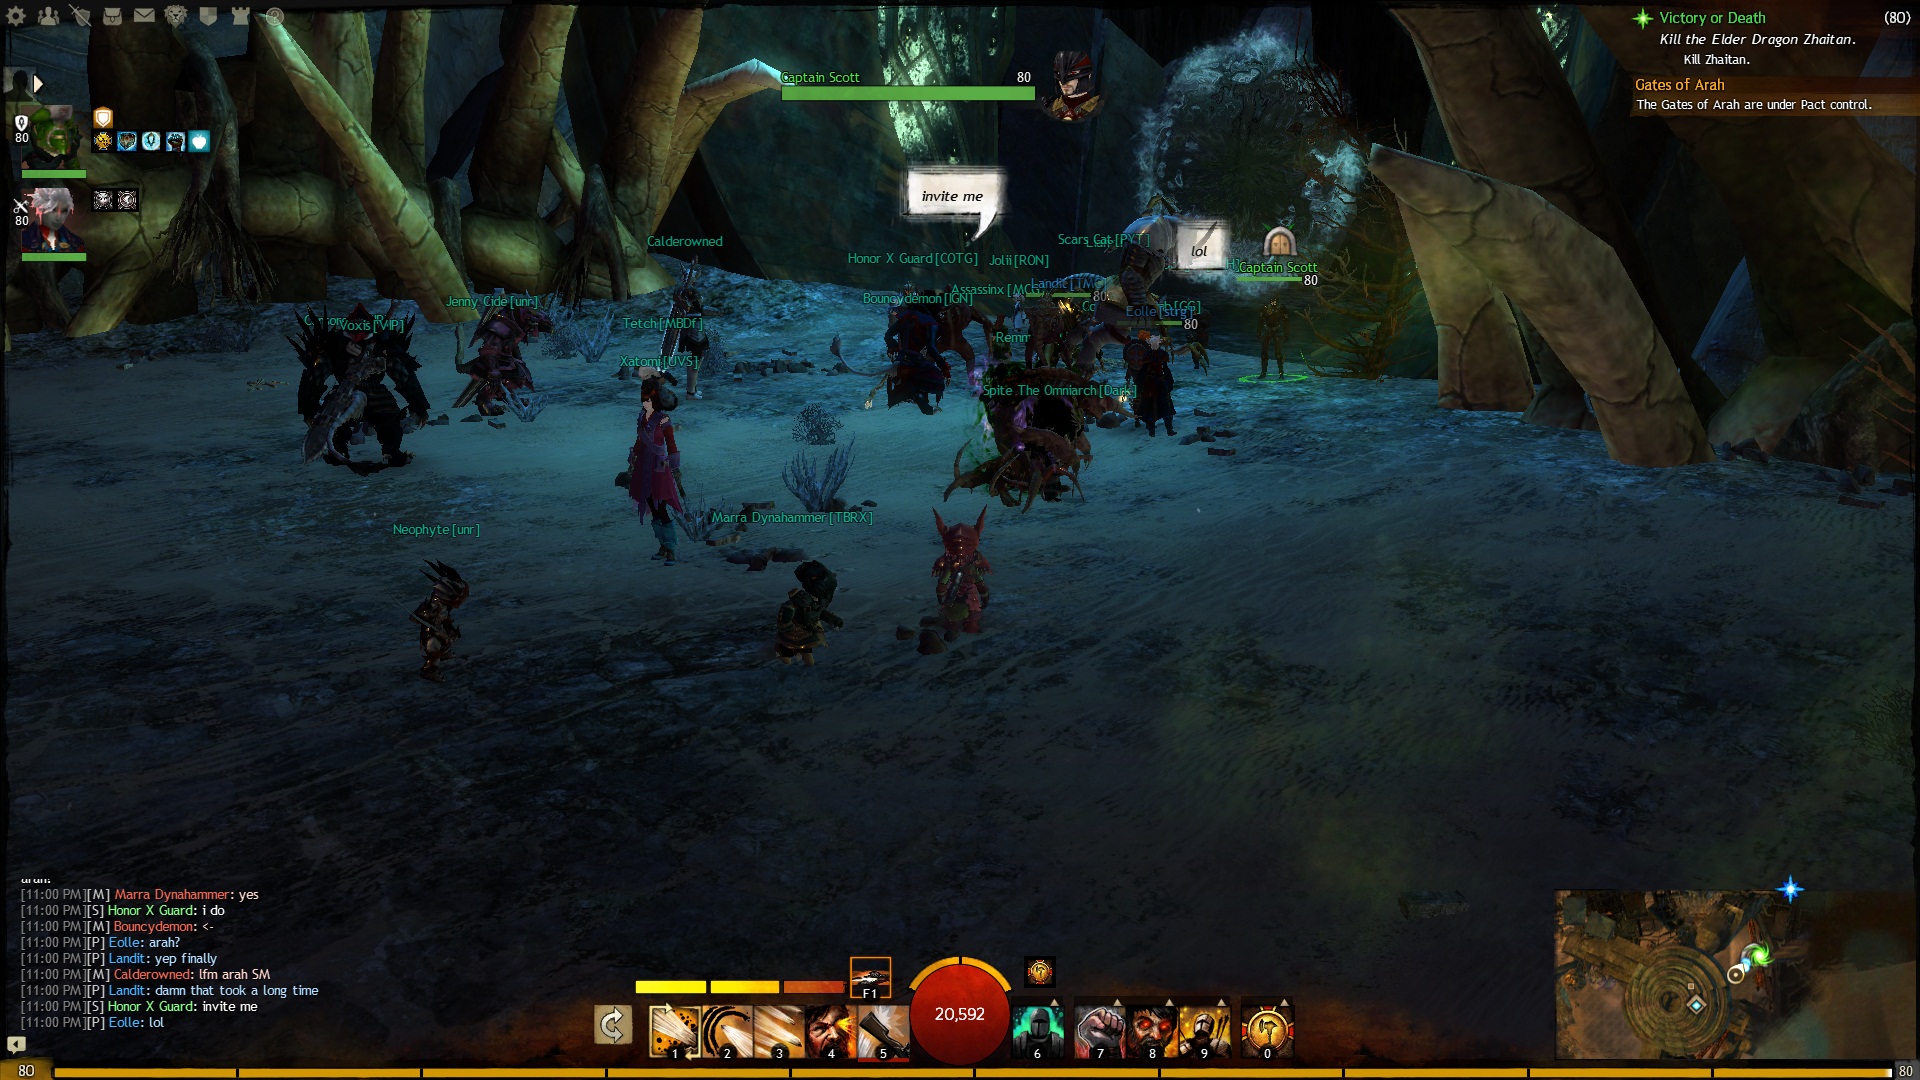
The last gate keeper is a Champion Risen High Wizard, and he is surprisingly easy to defeat. You can even jump into melee range for this one because he doesn’t deal AoE damage (as far as I can tell). Defeat him before the timer is up, and a chest will spawn and the doors to Arah will open.
If you fail at any point during the assault, you will have to retreat to Anchorage for another event. Here you’ll have to fight off risen who are attacking Anchorage for a few minutes. If you successfully chase them off, you can start the assault at the stairs all over again (at least you don’t have to start from the very beginning).
Entering Arah and Taking Down the Dragon
Once you take down the gates, you have to form a group quickly and hop into the dungeon before the Pact loses control. I’m not sure how long this window is open, but the nature of these events is that they are short lived. There is no waypoint to the dungeon, so if you fail to organize a group at this point you’ll have to finish the meta event all over again.
The story mode of the dungeon Arah is relatively easy, I’d say on par with the earlier dungeons. You have to go in knowing how to take care of yourself, but there’s room for mistakes. There are several bosses in total before you reach the dragon (five if I remember correctly, not counting events).
The first boss shoots out green spikes of light (similar to the personal story boss) that you need to strafe to avoid. The second boss summons worms that slowly crawl towards him. The worms need to be killed before the boss can eat them. The third boss summons plague carriers (those nasty risen who have low health but will explode and afflict you with all conditions if you’re in the way). Those are pretty easy to handle if you either kite them or wait until they reach you then quickly dodge the explosion.
|
|
As a general lesson for this dungeon, DO NOT melee the eyeballs on a stick. They will kill you in about half a second. Just shoot them from range.
Next you’ll hop onto an airship and defend yourself from extra giant giants. We had three people on cannons shooting the giants and throwing up shields (the cannon shields have a 7 second cooldown with a 7 second duration, keep them active) and two people fighting off undead that landed on the airship.

|
|
Next you hop off the airship and have to tear down three towers. The towers themselves have weird hit boxes, so you have to stand very close to hit them even with a ranged weapon (and even if your ranged indicator says you’re in range from further away). Undead will spawn as long as their associated tower is still up, so try to burn the towers down quickly. Sometimes you’ll have to stop to kite undead.
When the towers are down, the fourth boss will spawn. He is one of those stomach-mouth guys, and he throws out fiery orbs that you need to dodge. Once the orb lands, stand next to it and wait for him to open his mouth and suck in air. Quickly pick up the orb and press 1 to lob the item into his mouth and make him cough. If you don’t throw an orb at him during this time, he’ll eventually pull everyone toward him and I think eat your boons.
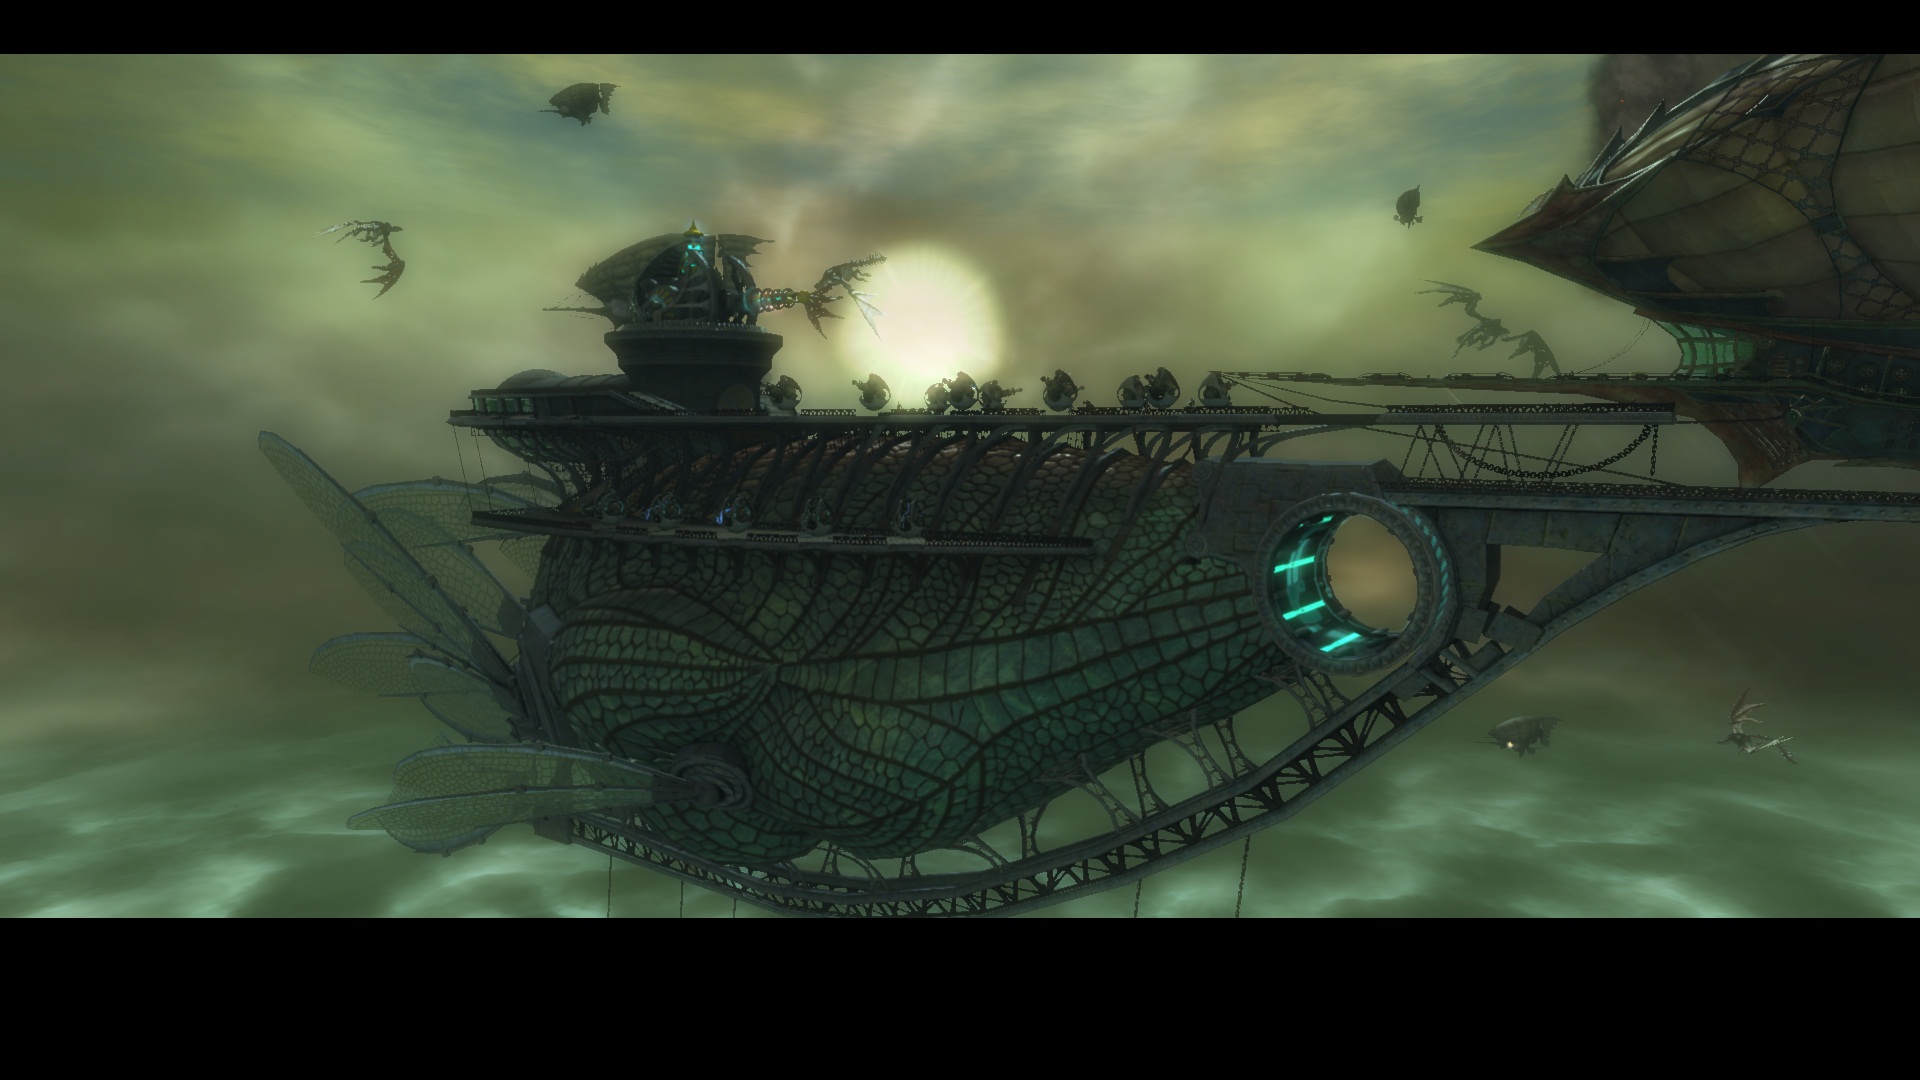
Once the mouth boss is finished, you’ll hop onto an airship for a series of aerial battles. The chest from the previous boss can be found on the ship. Undead will periodically land and attack you. If you die, there’s a waypoint on the back of the ship and also a repair anvil, so don’t worry too much about that. Eventually a dragon will attack and you have to use cannons to fight him. The dragon can only be hit when he hovers next to the ship, so when he’s not there hop off the cannon and help clear the waves of undead that spawned.
More undead will spawn, then finally two dragons will appear. This is the most difficult event of the dungeon, and you will die many times because the dragons breathe huge circles on the ship that will knock you back (at least they don’t knock you off). The best strategy we found was to fight the undead on the sides of the ship, as opposed to the front where the AoE knockbacks linger, and quickly run to a cannon when you see a dragon coming into range. We almost always died after attacking a dragon from a cannon, but it’s the only way.
Finally, you get to hop onto another airship, but this one is all sorts of pimped out. This is where you finally meet Zhaitan. First you fight waves of undead while protecting Destiny’s Edge. Once they do their thing, you have to kill more Eyes. These Eyes would heal themselves at low health. We couldn’t figure out if this was a bug or we were doing it wrong, but eventually we tried some things (knocking them back, dpsing them down many times, wearing down all three at once) and they died. I’m not sure how they died, but they did.
As a side note, there are quite a few times where everything is silent and you feel like you missed something. Don’t worry, it sometimes takes a long while for events to move from one to another. Just hang out a few minutes until the music starts up again.
So once the eyeballs are dead, it’s time to fire lazers at Zhaitan! This part is easy, just pick a cannon and aim it at him and spam 2. It’s sort of an anti-climatic end, and I feel like Zhaitan suffers from dragon-is-bigger-than-camera syndrome (similar to Deathwing), but it was pretty satisfying.
Unfortunately, the loot sucks. The whole party never got anything other than blue quality gear for level 76, except for completing the dungeon which gives you one yellow quality helm. You don’t even get anything good for finishing your Personal quest, which is sort of a downer. I assume explorable mode will drop nicer things.