
Four (and more) orcs that must die. And their treasure.
Kor’kron Dark Shaman
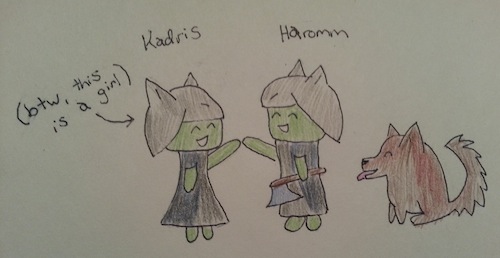
Most guilds use a three tank, split group strategy. Two tanks on Earthbreaker Haromm, swapping for the debuff, and one tank on Wavebinder Kardris.
On the Pull
- The whole raid should stay together until the wolves die. This is a great time to use any AoE cooldowns and dps potions.
- Once the wolves are dead or nearly so, the raid groups should separate. Haromm’s group goes up near the tanks on the hill. Kadris’ group remains at the bottom.
Earthbreaker Haromm
- Swap on around 4 stacks of Froststorm Strike, or once your own debuff stacks fall off.
- Froststorm Strike hits hard at high stacks and deals magical damage. It is cast frequently, though it is not strictly predictable.
- 95% Health – Gains the ability Iron Tomb. As a tank, you won’t be targeted by this unless there aren’t enough non-tanks to be targeted. You only need to watch out for when your healers get targeted and understand that they’ll have difficulties healing you for those few seconds. The tombs don’t cause line-of-sight issues, but they do cause collision issues.
- 85% Health – Gains ability Toxic Mist. As long as there are enough non-tanks up there, you don’t need to worry about this.
- 65% Health – Gains ability Foul Stream. The damage isn’t threatening for tanks, so all you need to worry about is pointing it away from non-tanks.
- 50% Health – Gains ability Ashen Wall. If tanking during the cast, you need to make sure the boss is facing the right direction. The wall appears perpendicular to the direction he’s facing. Sometimes it’s easiest to back him out and reposition him to get the direction just right. Place the walls as close to each other as possible without getting hit by the ashen elementals.
Waterbinder Kardris
- 95% Health – Gains ability Iron Prison. As a tank, you don’t need to worry about this other than potentially helping your healers keep you up when it’s about to be cast on someone else.
- 85% Health – Gains ability Toxic Storm. Annoying tornados that you need to avoid. Kite around the room so that your raid doesn’t have to stand on top.
- 65% Health – Gains ability Foul Geyser. If you’re not able to face-tank these, then you’ll have to kite them. Just like in normal, stand away from the raid when they’re about to go out.
- 50% Health – Gains ability Falling Ash. Just like normal, stay out of the bad.
Brewmaster Stuff
- Haromm: Glyph of Guard, Xuen (for burst on the pull), Chi Wave
- Kardris: Glyph of Guard, Chi Burst (for ranged AoE on Kardris’ adds), Rushing Jade Wind (for regular AoE on the adds)
General Nazgrim
- New ability: Execute. Deals a lot of physical damage to the current tank.
- Most tank classes can handle Execute without cooldowns at 0 to 1 stack of Sundering Blow, as long as you’re prepared to recover with heals and other reactive Active Mitigation.
- At 2 or 3 stacks, you should have some type of cooldown or strong Active Mitigation available.
- The Legendary Tanking Cloak is really good for preventing wipes due to imperfect cooldown usage.
- As in normal mode, swap at three stacks of Sundering Blow. It’s very important that you don’t let stacks get above three because it’s unlikely your raid can handle that much extra rage generation.
- While not tanking, you can help with adds. The two that should probably be tanked by you are Kor’kron Warshaman and Kor’kron Ironblade.
- The Warshaman needs to be far away from the boss to prevent healing. It hits non-tanks pretty hard, so they will need you to tank it for them.
- If you need to swap the boss while a Warshaman is up, the two tanks will need to trade at the same time or the Warshaman will need to die immediately.
- At the end, Nazgrim will summon adds faster. This is a burn phase. One tank stays on the boss (who hopefully dies before Sunder stacks get too high) and one picks up adds. The adds hit hard to you might need a cooldown, and AoE control works great on them.
Brewmaster Stuff
- Dampen Harm, Chi Wave, Xuen (adds are rarely close enough to benefit from sustained AoE like Rushing Jade Wind), Glyph of Zen Meditation, Chi Brew (there is a lot of movement combined with predictable damage events that need fast chi generation), Leg Sweep or Charging Ox Wave for add control
- Brewmaster specific: With Guard, Dampen Harm, Zen Meditation, and Fortifying Brew, you can actually have a cooldown up for almost every Execute. The key here is almost. I recommend using only Purifying Brew and your heals if you have 1 or no stacks of the debuff and saving your powerful cooldowns for the more dangerous Executes.
- Use Transcendence to quickly move between the boss and adds.
Malkorok
- Modified ability: Seismic Slam. Now summons an add, Living Corruption on the targeted player.
- The add is surrounded by an aura that snares everyone nearby. The snare makes it harder to move out of attacks, but as long as you’re close to the boss it’s rarely more than annoying.
- Tanks need to pick up this add. It doesn’t have much health, but it can kill non-tanks if they have aggro and it needs to be near the melee because they can handle the snare better.
- New ability: Essence of Y’Shaarj. Orbs that appear on the floor and remove your shield if stepped into. The offtank can soak these pretty easily, though the main tank needs to be careful. Whatever you do, don’t soak so many orbs that you won’t survive when back on the boss.
- Bloodrage
- Monks can single-tank the Bloodrage with some smart cooldown usage. Two-tanking the Bloodrage is also viable.
- Rook’s Unlucky Talisman is a very effective way to reduce Bloodrage damage. If you don’t have this trinket, then you may need to rely on a healer cooldown instead.
- You will likely encounter two Bloodrages (though with good dps your raid can cut that down to one). They are about 2min 45s apart, so big 3 min cooldowns will usually not be available for both.
- Whether solo-soaking or dual-soaking, this will likely be your highest Vengeance point so it’s a good time to use dps cooldowns.
- If solo-soaking, the offtank should run around popping as many orbs as possible.
- Taunting order: If solo-soaking, it’s important that your solo tank doesn’t have a long duration or high stacks of Fatal Strike as you enter phase 2. You’ll need to organize taunts around this. For my group, this meant letting the Bloodrage tank start and tank until ~20 stacks, then swap once 1st tank’s debuff fell off, then 2nd tank taunts when their debuff falls off, then let 2nd tank hold the boss until phase change.
Brewmaster Specific
- Here’s the Bloodrage cooldown rotation I used:
- 1st: Fortifying Brew + Rook’s Unlucky Talisman, then Dampen Harm
- 2nd: Zen Meditation -> Rook’s Unlucky Talisman + Dampen Harm
- Save Guard for when your health spikes
- Quick Purifies will heal for a huge amount with T16 4pc.
- If you’re not solo-soaking, then you can change your tank order a bit after the return of phase 1 and use a high vengeance Guard to absorb a ridiculous amount of orbs.
- If you end up not needing Dampen Harm during Boodrage, Diffuse Magic works well for absorbing a large number of orbs in a small area.
- Talents: Tiger’s Lust (to avoid bad ground effects, and not rolling into orbs), Dampen Harm, Xuen, Glyph of Zen Meditation
Spoils of Pandaria
- New ability: Unstable Spark. Every time the occupants of a non-Pandaren crate die, a spark spawns for the opposite team.
- As a tank, this means you have to open boxes such that the other side isn’t overwhelmed with too many dying at the same time. You have to space out the small boxes.
- Tank groups in the right position: center is best if all the mobs are mobile, so that dps can easily swap and cleave onto the sparks when they spawn. If there’s an immobile mob, then you’ll have to stay near it.
- The rest of the mechanics are the same as normal mode, just more important to pay attention to.
- Remember that in 10 man, you’ll only receive heals from a single healer so you have to be even more self-sufficient than usual.
Kill Order
This is the order I used (for a grand total of 2 larges, 6 mediums, 4 smalls)
- 2 pandas & 1 small, + 1 small after a panda dies
- 1 large + 1 small
- 2 mediums (always try to have 2 open at a time, when one dies, open the next)
- 2 mediums (always try to have 2 open at a time, when one dies, open the next)
- 2 mediums (always try to have 2 open at a time, when one dies, open the next)
- 1 large + 1 small
Brewmaster Specific
- Talents: Rushing Jade Wind, Healing Elixirs (not much use for Dampen Harm or Diffuse Magic)
- Place Transcendence near far away boxes or the switch for fast access.